Wheel & Tire Detail ft. Toyota Tacoma TRD Pro
by Reece @ DIThese beautiful Toyota Tacoma TRD Pro rims and Goodyear tires come to us from our warehouse manager Charlies new ride. While your wheels and tires are some of the dirtiest parts of your vehicle as they are so close to the road, these were fresh from the dealership so dirt, grime, brake dust, etc. was minimal. What we planned to do here is to knock off any contamination with a light wash and remove all of the silicone dressing the dealership applied to the tires. It is highly recommended to remove a dressing like this as it can brown your tires over time. Once you are done cleaning, protection on each surface will keep these areas protected from road grime, while looking their best for a long time. Check out the cleaning and protection steps taken on each of these surfaces below!
Wheels
Before starting, your wheels should be completely cool. If you have been out driving, even just a little bit, give them ample time to cool down before using any cleaner on them. Since these wheels were fairly clean, we used a bucket and filled it with water and some shampoo. When paired with a wash mitt, this allowed us to remove most of the light contamination on the surface. If you are looking to clean your wheels when they have more contamination on them, I recommend adding a good brush and a dedicated wheel cleaner to your detailing process. This will provide you with that extra cleaning power to safely remove dirt, grime and brake dust from the surface. Check out a few of my favorite wheel cleaning products below.
- 3.5 Gallon Bucket
- Grit Guard Insert
- P&S Pearl Auto Shampoo
- Gtechniq W6 Iron and General Fallout Remover
- P&S Brake Buster Non Acid Wheel Cleaner
- DI Brushes EZ Detail Brush
- DI Brushes Pro Series Wheel Brush
- DI Brushes Boar’s Hair Detailing Brush
Tires
As with your wheels, make sure you let these higher heat areas cool down before starting your detail. The silicone dressing applied by the dealer looked great at first, but it will brown your tires over time and they will not look great at all. You will have an incredibly dull and brown look, so you are going to want to remove this dressing from the surface as fast as possible. For this detail we started with a quick clean of the rubber with the shampoo while we were taking care of the rims. This knocked off all of the loose contamination and allowed us to move right into deeper cleaning.
For this we reached for the Tuf Shine Tire Shine Kit, which is easily my favorite tire care product. You want to thoroughly clean the tires with the supplied cleaner and brush. This will most likely take multiple applications or scrubbing sessions, so do not expect to hit each tire once and be all set. We worked this cleaner 3-4 times per tire, but the cleaning process is extremely important to prep for the clearcoat. When the tire is clean apply the tire clearcoat with the supplied applicator just like you would any other dressing, with a nice thin coating. I personally apply two coats for more gloss, but I have gone up to 4 before as well. When you are done you will have a shine that does not last days or weeks it lasts months and the protection will generally last over a year! It is incredibly durable and looks amazing for so much longer than any other dressing I’ve used. If you want something that is a little less labor intensive, you can pick up the Tuf Shine Tire Cleaner separately and apply a different dressing like the Gtechniq T1.
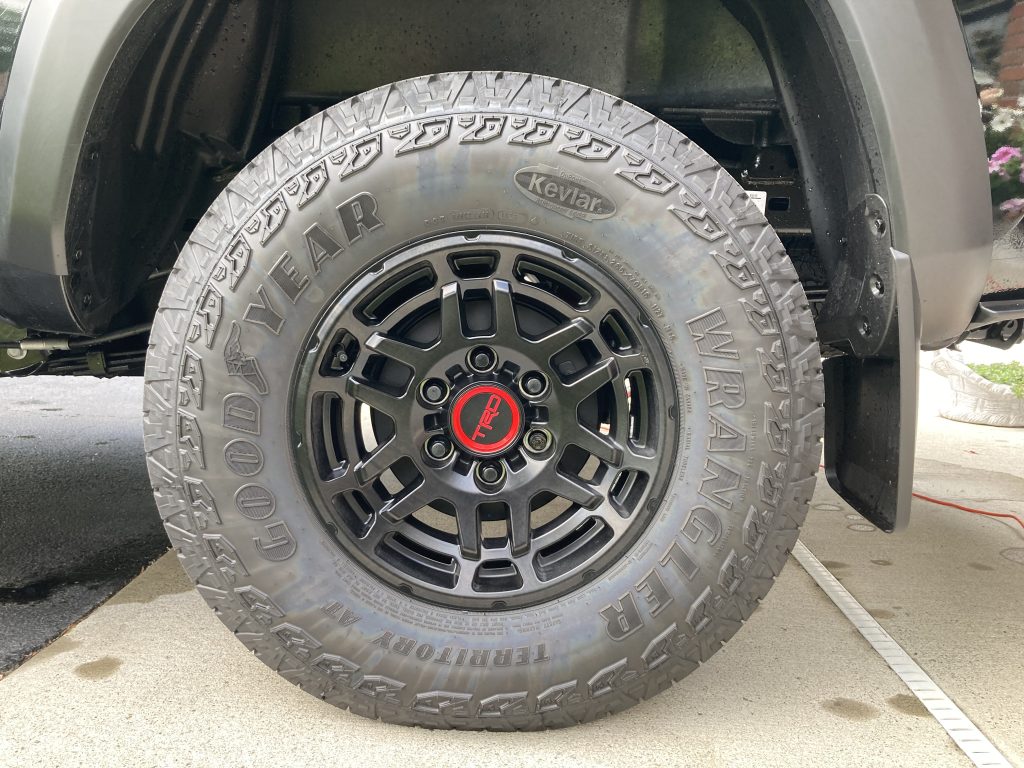
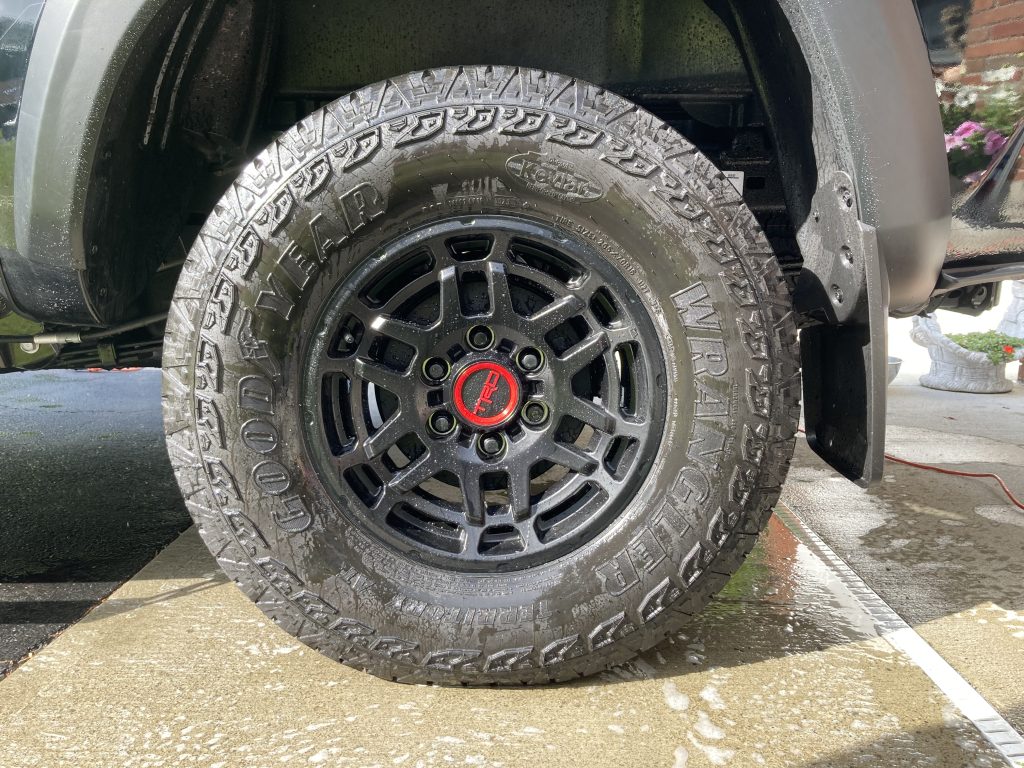
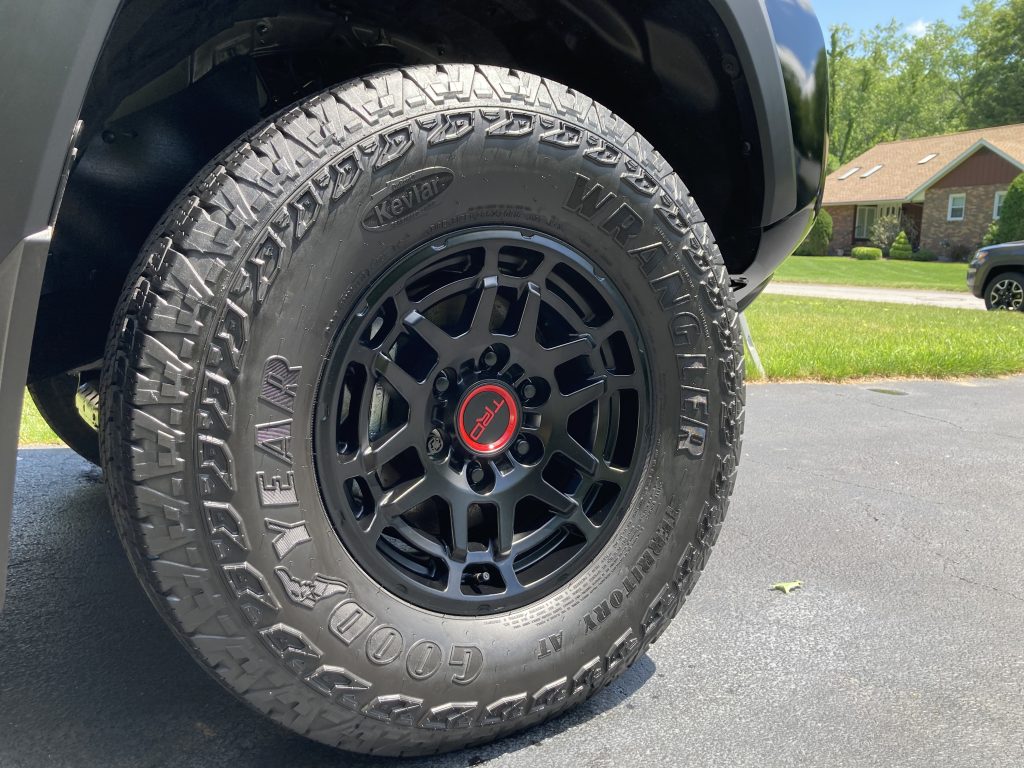
Check out the photos below, which list the steps of the wheels and tires in order of before cleaning, during cleaning and the finished results!


Buy Products From This Article
Related Posts
- Car Candy Chocolate Thunder Wheel and Tire Cleaner Review: A Sweet Solution for Tough Wheel Cleaning
- Volvo XC60 Wheel Detail: Aquatek Profile Wheel & Metal Coating + Bliss Topper
- Ford Maverick Hybrid XLT – New Car Detail
- The Ultimate GYEON Detail: Plum Crazy Hellcat
- How-To Detail Your Wheels & Tires using Meguiar’s Products


No comments yet. Be the first!