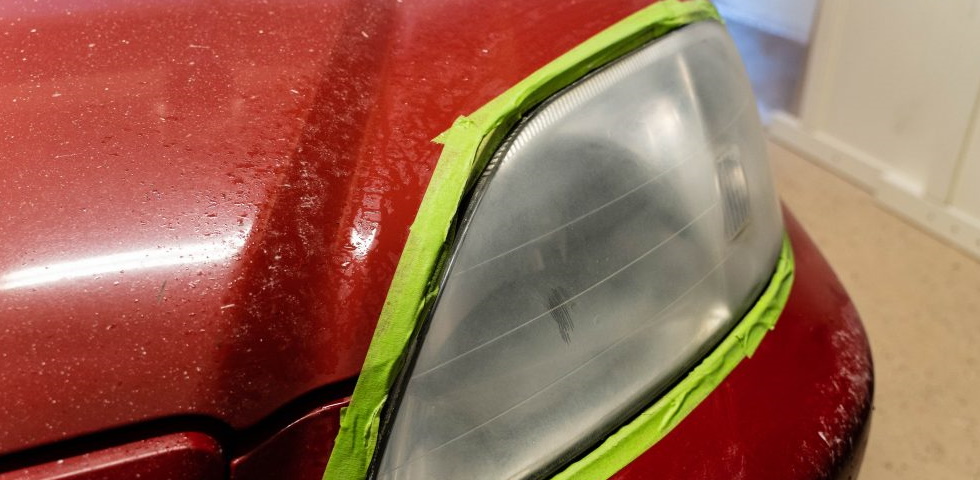
Headlights today are made of a polycarbonate plastic, which is cheap to make and looks pretty good compared to glass. However, it is very prone to damage from UV rays. So manufacturers put a coating on it, much like a clear coat, to protect it. Over time that coating fails and the headlights start to yellow and look like this.
Greatly reducing the light output, and making your car look years older than it is, like your receding hairline. Luckily, the fix is much cheaper. So in order to correct this, you must remove any excess of the coating, smooth out the plastic, and then polish back to restore the clarity.
The kits they have at the stores are actually the correct idea, just doing the sanding by hand isn’t going to get the job done. So what do you do?
First, clean and clay the lights. Tape up the body panels around the light to protect them from sanding, those edges are the thinnest with paint so be careful you don’t hit them. Then, I like to start with 1000 grit sandpaper on a 3″ backing plate. Remember that you are wet sanding so keep the light and sandpaper properly lubricated, about as much as you would when claying the paint. This will make quick work of the oxidation. You know when this step is done when you have a smooth, even haze of the lights:
Keep in mind the better condition the lights are in, it will actually be harder to remove the excess coating since it is so durable.
Next, I step up to 1500 grit and repeat the same process, again you are looking for an even finish to know you have broken down all of the 1000 grit marks. This step is usually the most difficult to tell if you have done enough, and will regret it later if you have not, so take a few extra passes to be sure. Once you do a few headlights you will notice the difference between the haze of 1000 grit and 1500 grit.
Next, we jump up to 3000 grit. this may seem like a large jump but keep in mind even though the gap between grit numbers is large the actual difference isn’t that large since it is getting so fine, make sense? You should see a significant difference now and even start to see some clarity as you are wet sanding.
Not bad right? Now we move on to the easiest part, the polishing. Simply grab a 3″ microfiber cutting pad and your desired compound, I like to use the Griots Garage Fast Correction Cream, or the Menzerna SHCC 300 if there were some tight areas that were a little hard to sand to give some extra cut.
Now we are getting somewhere, I like to finish it off with a 4″ Rupes Yellow Pad and Griots Garage Perfecting Cream.
IMPORTANT: Now that you have removed the factory coating, although they look very good, if you do not keep the protected they will oxidize again VERY quickly if you live somewhere with a lot of sun. So you must keep it protected, and whether that’s wax or a sealant that you apply every few months, or a ceramic coating, just make sure they are protected and check up on them when you wash. Also note that a ceramic coating is not the same type of coating they apply from the factory.
I like to use the Gtechniq CSL Black combo of CSL and EXO, and then top it with C2v3 every few months.
Enjoy your revitalized headlights! You will see a vast improvement on light output
For just a few hours and not too much money in product, you can greatly improve the look of your car, probably one of the most bang for your buck detailing services you can do for an older vehicle.
