How to Detail Your Engine Bay
by Todd CooperiderOverview
We spend countless hours detailing the interior and exterior of our cars, but how many people give the needed attention inside the engine bay? Having your engine bay properly detailed not only looks great, but it also helps fight potential corrosion as well. With a few simple tools and supplies, you too can keep the area under the hood looking like it was professionally detailed.
Precautions
I’ve spoken with a tremendous amount of people who don’t detail the engine bay simply because they’re concerned about damaging the car. It only requires a few preventative measures along with some common sense, and you can clean your engine compartment without worry. The biggest concern is that water will short out electrical connections. In most modern cars, key electrical components and housings are tightly sealed from the elements of daily driving. As long as you’re not directing a strong stream of water (or a pressure washer at close range) directly into these components, you will be fine.
Precautionary Tips:
- If the air intake opening is directly in sight, then you can either stuff it with a towel, or cover it up with plastic wrap and a rubber band (don’t forget to remove it when you’re done!).
- If you have an aftermarket intake system with an exposed air filter, then cover it up with a plastic bag and secure it with a rubber band.
- If you have a fully exposed alternator you can either cover it with plastic wrap, or even better yet use aluminum foil. The foil is easier to mold and fit around the alternator without having to tightly secure it.
- Use the wide spray pattern on your hose nozzle as opposed to a strong stream. You only need a light rinsing as the cleaners and brushes will be doing all of the work.
- Working on a warm engine is fine, but if it’s hot, then let it cool for a while.
Items Needed
- An all purpose cleaner, such as P21S Total Auto Wash or Chemical Guys Grime Reaper if you require heavy degreasing
- A brush like the Mini E-Z Detail Brush
- A sponge or wash mitt
- Protectants and dressings, such as 303 Aerospace Protectant and Chemical Guys Fade 2 Black
- Microfiber Towels
How-To Detail Your Engine Bay
This engine bay has just gotten through a rough Midwest winter, and everything is covered in grime.

First start out by completely covering all surfaces (including the under side of the hood itself) with P21S Total Auto Wash. This is a gentle cleaner that is safe to use on virtually all areas.
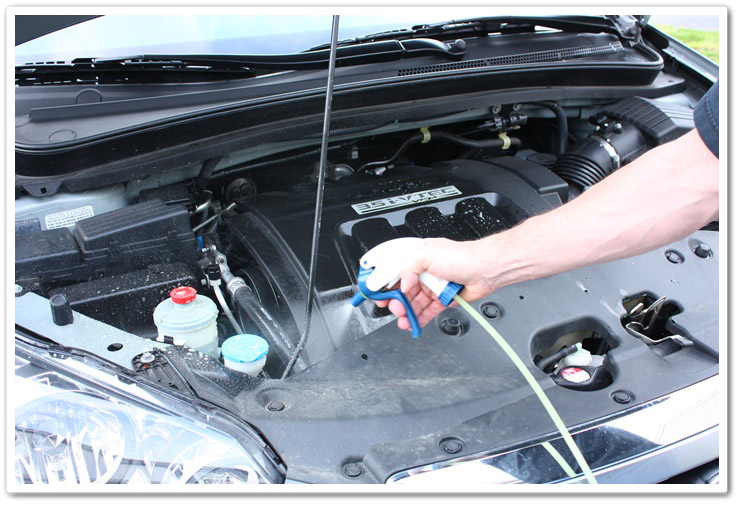
Now that everything is covered, let it dwell for a few minutes so it can break down the grime.
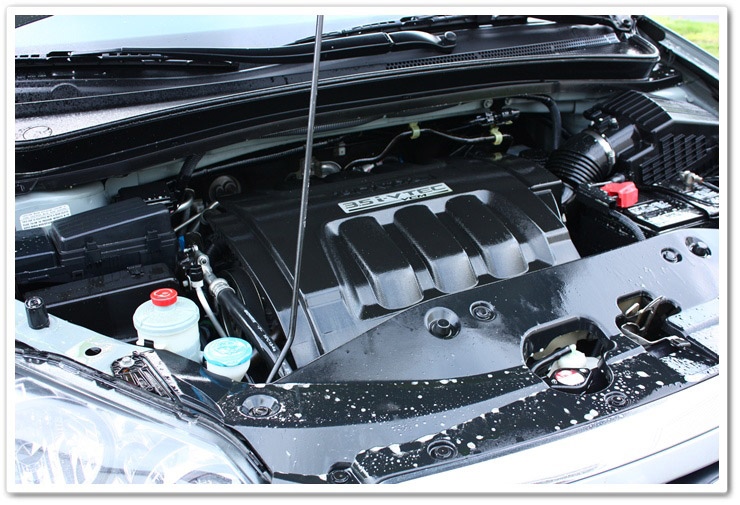
Using your Mini E-Z Detail Brush, agitate the heavier buildup. You can use your sponge or mitt for cleaning the larger flat surfaces.
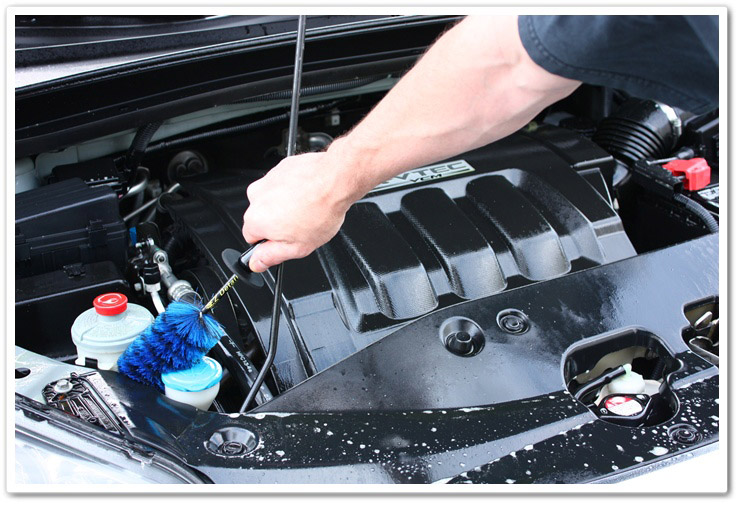
As you can see, the Mini E-Z Detail brush does a great job of getting into all of the hard to reach areas.
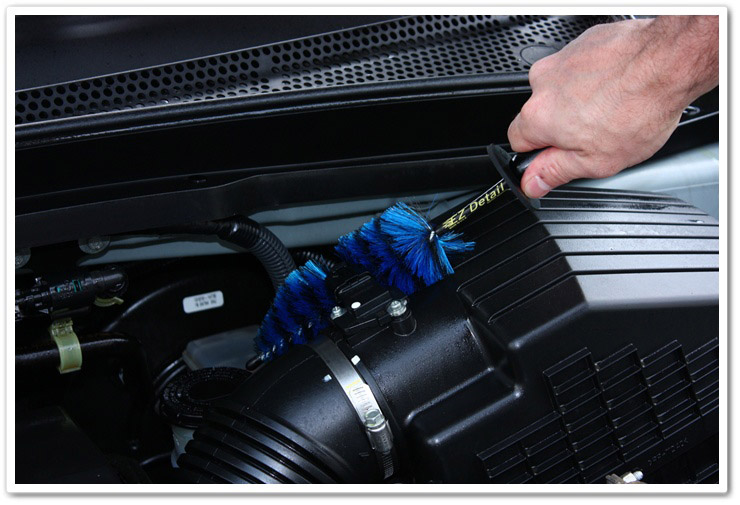
After you have brushed and wiped everything down, lightly rinse it all off with a gentle spray of water. Start with the underside of the hood first, and then work your way into the engine compartment. There are plenty of places for dirt and grime to hide, so be thorough with your rinse.
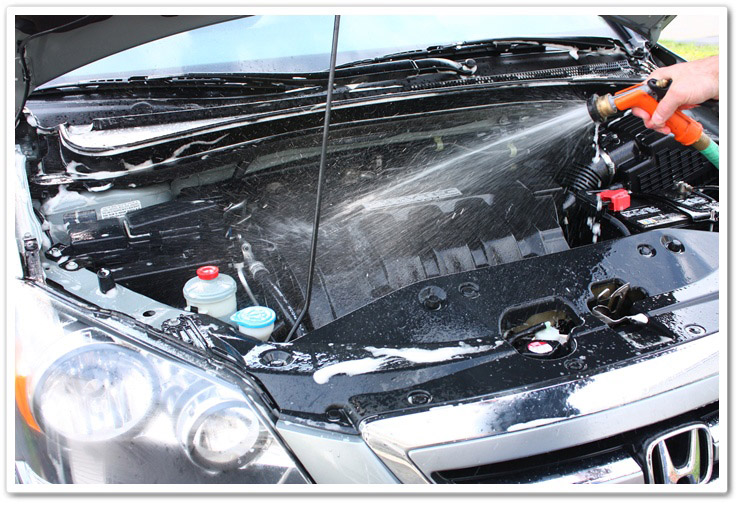
If you have a Metro Vac & Blo or compressed air, use it to blow all of the standing water away. If not, then just use your MF towel to wipe it all down. For further drying, you can also start the engine and let it run for a few minutes.
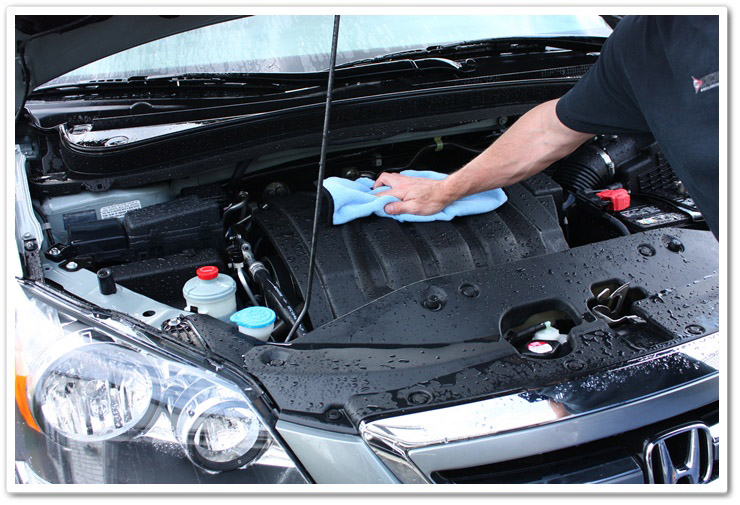
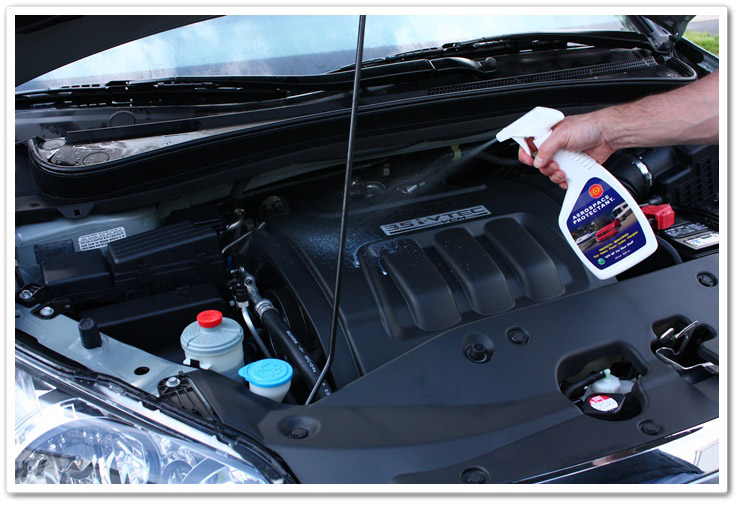
Now it’s time to add the finishing touches to your engine compartment. Spray on 303 Aerospace Protectant to all plastic and rubber, and then wipe it down to reveal a matte finish that is not greasy or oily. This is a tremendous and versatile product that can be used on many areas of the car.
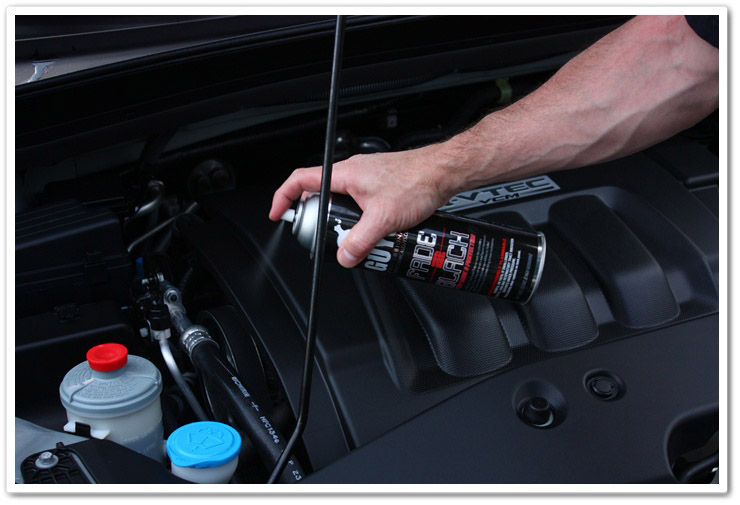
For hoses, wires, and other hard to reach rubber and plastic pieces I like to use Chemical Guys Fade 2 Black (this is also my go-to product for the wheel wells!)
All done! Now you have a much nicer looking engine bay that is clean, free from potentially corrosive materials, and protected from the elements.

Engine Bay Before and After Photos
Before:

After:

Before:

After:

Before:
After:
Before:

After:

Buy Products From This Article
Purchase the products used in this article individually or in one convenient package here!


Awesome write up on detailing. I plan on starting my own detail business and you basically gave me the blueprint to the whole operation. Thank you for such a detailed outline.
Excellent job! Would using this method the same way be safe for an 07 z06? Outside of the alternator and filter, there seems to be a lot more exposed electrical parts in the z06 compared to this Honda engine. It could only *appear* that way…
Thanks
Yep, pretty much the same…just cover the mentioned components. I cleaned the engine bay on both a Z06 and a regular C6 Corvette last year and all was good. You can even see in the engine photo of the C6 article where the alternator is the only item covered.
Good Morning,
Not sure if you’re still monitoring replies to this page, but I thought I’d give it a shot. What about older cars? I have a 97 Buick Regal GS that I’m trying to restore back to stock. Before I do, the engine bay needs a good cleaning, and badly too. Any additional safety/cleaning tips for restoring older vehicles? Thanks for any info you might provide. It’ll be the first time I’ve ever detailed an engine.
I understand that this part of a detail can be nerve racking, however I assure you that it is pretty easy and you will do a great job! Before you start I would recommend making sure you cover up anything you do not want to get wet like air intakes or electrical components. Newer cars are generally very well covered so the older your car is can mean more parts are exposed. If you do have something that you think should not get soaking wet just do not spray it with water. Even though the car is a 97 and it may seem older, many components should be covered already. I used to have a 97 Ford Escort and I did not cover anything up. I just watched where I sprayed product and made sure not to soak certain areas that may look questionable.
As for the cleaning supplies I really like the P21S Total Auto Wash. It is a strong citrus cleaner that is pH neutral so it will not damage any parts. Spray this everywhere you find safe (avoid belts or moving parts) and scrub away with a firm bristled brush (i.e. EZ Detail Brush). Then all you have to do is rinse and protect. Other than that, follow the steps in this article and your engine bay will be clean in no time! Hopefully this information was helpful and if you have any other questions please do not hesitate to contact us here: https://www.detailedimage.com/Contact/
did you use tin foil to cover the alternator?
What about cleaning the engine bay for a lexus 1994 ls 400 whats the process?
Mervin,
Just follow the basic guidelines in the article and you should be fine. If an item looks questionable for getting wet, then just cover it up with plastic or foil.
Good luck!
Todd
[…] How to Detail Your Engine Bay – Detailed Image __________________ 2010 z34 k23 H&R sport springs / Spc rear camber arms / Ichiba 20mm ver 2 / Berk cbe / Varis cf lip […]
Could you spray Fade 2 Black to a microfiber towel or foam applicator pad, then apply? My concern is over spray to objects you don’t want the product on. Also, I would advise against using foil in the engine bay. Reason being that it conducts electricity. In a perfect world there would not be any terminals/wires that have a positive potential (positive). 98% of the metal in the engine bay is a ground (negative). If the foil were to connect the two by simply touching both at the same time, you could very likely have a car fire on your hands. So I say to use plastic bags and 3M blue painters tape to be safe.
Yes you could spray Fade 2 Black onto an applicator and apply it that way if you wanted to avoid overspray…
To be safe I would suggest disconnecting the battery. Further suggest pulling battery out which would alleviate the problem some else mentioned about water collecting in the battery holder.
I’ve never had a single issue with the battery, but feel free to do that if you know what you’re doing. If you’re working on a client’s vehicle however, keep in mind that by disconnecting the battery you can/will erase a lot of memory in things like the radio, GPS, etc. Any time I have to disconnect the battery in my car, I have to reset codes that I can never seem to remember where I wrote them down! This could be a little upsetting to a customer if you give them their car back and they have to figure out how to reset all of these things. Just something to think of…
I take pictures of the manufacturer provided cards or manual pages containing the engine and audio system security codes. Whenever I need to reset them I just look them up on my phone.
For a business, you just warn your client to be ready to reset the security codes on the car. The client may refuse the remival of the battery, in which case you have them sign a waiver of responsibility in case of electrical problems during the engine detailing. All that said, I’ve never seen water cause electrical damage even when the whole car is submerged.
Some advice please.
My Mom’s 74 Mustang II (30,000 original miles) just took Bronze in the unrestored original class. Of the the 78 points deduducted there was a 25 point mandatory deduction for the engine being oversprayed.
The detailer spray painted the engine as favor to us. This happened about a year ago. The has all it’s original white paint, spark plugs and plug wires. What would be the best way to remove the spray paint and not harm the original. Believe me they we find almost any flaw, lost one point for a dirty brake pedal and one point for a dinged step plate on the driver’s side door sill.
Thanks
Bob,
Without actually having the car right in front of me, I can’t give exact advice on how to approach this because there are simply too many variables. In some cases detailing clay will remove it, but it depends on what surface it’s on. If the paint is on rubber surfaces, you’ll need to try one method, but if it’s on other painted parts you may have to try another. If you need to do a chemical approach, it’s questionable about how it will affect the original paint underneath. Unfortunately I’m unable to guarantee either results or risk in a situation like this one.
You may want to seek a local restoration professional on this one simply because of the risk factor involved.
I hope this helps.
Todd
Thanks for your reply.
Just engine parts & radiator that were originally black were painted.
Most likely, it is best just to leave the paint.
We show the car just for fun. It is too bad, but things this happen.
If you do too well in unrestored original (two gold place finishes) your pushed into concours.
Then things really get serious, picking rocks out the tires, etc.
Now, it just hanging out meeting nice people.
Again, Thanks pardon the bad typing.
Bob
Todd
I want to detail the engine bay of my Audi A5 but frankly I’m very afraid. I have read all your articles but still not sure. Any particular suggestion for Audi A5?
Your comments are always appreciate it
Art
Art,
If you follow these instructions, you’ll be fine! Just be careful of the air intake, and only use a fine mist of water. Modern cars have their delicate electronics components sealed up…
THANK YOU!
Fine mist will rinse the TAW.
I have a good teacher and I will be very careful!!
Todd,
Quick question: I have many polished aluminum parts under my hood. Are the chemicals you’ve used safe for all of my polished parts, and won’t stain them or leave a less-than-shiny luster?
Thanks so much, what a great how-to!
Great name by the way, I’m a Todd too =)
-Todd
Hey Todd,
Any time you’re dealing with un-coated polished aluminum parts, you run the risk of staining when using any heavier cleaners…especially if it gets on them while hot or allowed to dry. If you’ve got polished aluminum under your hood, then I could assume that you already do a good job of keeping it clean under there. If this is the case, you’re in need of more of a light wipedown than a full detail. When working on something like this, I’ll typically just use some Optimum No Rinse pre-mixed in a spray bottle, and then use a soft microfiber towel. If your engine bay is pretty dirty however, you might want to take the safe route and cover those polished aluminum items up as much as possible, and use a dilluted ratio of a product like P21S TAW.
I hope this helps!
Thanks,
Todd
I covered my air intake,distributor cap and battery on my 73 M-B. After spraying with P21 wash , I rinsed with a soft spray from the garden hose. I started the car to dry the engine but it now runs Very rough and I get black smoke from the exhaust. Did I somehow get water in the carb and if so will running the engine eventually clear things out?
What about ferrari, porsche, Lamborghini, and such?
Tim Dodd
KC Detailing
Tim,
If you’re working with newer models, you can take the exact same approach…just be cautious if you see any exposed electronics. On older ones however (even from the 90’s back), I would be extremely cautious because they weren’t made with the same level of water-resistant electronics as they are today.
Good to know. I have been detailing all of the exotics engines by hand and it takes forever. Even though I am insured, guess I’m just a bit nervous to pressure spray the engine bay of a Murcielago. I could only imagine. “Sir, your car looks amazing, the paint is shiny enough for you wife to check her makeup in the reflection, but it won’t start. You mostly just let it sit in your garage anyways so….” Guys like you and Paul Dalton helped move me from cleaning pigged out 95 Fords to doing full details and paint correction on luxury and exotic cars. It is now rare for me to need my hot water extractor. Thanks a lot Todd!
[…] How to Detail your Engine Bay: Keep your engine compartment looking as good as the outside of the car by following this simple guide. […]
[…] Underhood Cleaning? How to Detail Your Engine Bay – Detailed Image __________________ 2010 GMC CANYON. Z71 EXT. CAB. 3.7 I5 FIRE RED. AQUIRED […]
Just a comment from someone in the electronics industry [automotive]. Most modern body wiring harnesses exposed to any moisture [under hood], have rubber boots inside the connectors which do not allow any water in at all unless they are dried up and cracked. As an extra measure of precaution, you could use a small plastic bag wrapped around any electrical connections if you’re paranoid about ruining a customer’s vehicle. These rubber boots have been used on Hondas since some point in the 1990s. I can’t speak for American vehicles or other imports.
I would never point a pressure washer directly at any connector because you can shift the rubber seal out of position and allow water to get in.
Just my $0.02.
There are only 4 key electronics connector mfg in the world – Yazaki, Amp, Tyco, Sebro that are approved for automotive. All of their connectors are sealed for underhood. IF you look you can see their logos on the connectors, and be assured they are watertight.
Problem is, not sure that all OEMs use water tight connectors – they are 3 times as expensive as normal connectors..just a heads up.
Be carefull useing aluminum foil around alternaters, because if you touch the battrey post conection on the back you could short it to ground and cause all sort of problems.
Thanks for the important safety tip Bruce!
Would Saran wrap be a good alternative to plastic bag and foil?
That should work as well…
This looks like the perfect plan for what I need to do with my 2006 Odyssey. I couldn’t tell but did you cover anything in the pictures above? Can you truly spray down the battery with a garden hose with no issues? I’m also quite leery spraying water (especially since I am an auto novice).
Dennis,
If I remember correctly, everything was pretty well protected from the factory on this Odyssey and I didn’t need to cover anything up. If you’re not comfortable with it all, then you could simply try to wipe down the components with a damp rag to get rid of the majority of dirt and grime, and then protect it as necessary. Most modern cars are sealed and protected from the elements, so a very light spray of water into the engine compartment shouldn’t do any harm when simple precautions are taken.
[…] not that hard. I used Simple Green all over the engine bay, let it sit, scrub and hose it down. How to Detail Your Engine Bay – Detailed Image __________________ 06 CL9 6MT PWP / Ebony w/ Navi – TL-S RSB | Resonator removed | K&N […]
I currently cleaned my engine bay in my 07 honda civic si. After I had let the purple degreaser I followed the rest if the necessary steps and it does look better but I noticed that on my engine it has this to it. I thin I may have let the purple power degreaser sit too long on the engine. What can I do to remove that? I tried some simple green but it didn’t remove it. By the way, I used 303 protectant and chemcial guyz as well.
Thanks,
-Matt-
Did it discolor metal, plastic, other? Some of those degreasers can be very harsh and can permanently stain if not careful.
When looked at up close, the engine has these specs that are a bit cloudy like different shades of gray and murky white. I tried using some simple green to remove but no luck. What would you suggest? I guess last case scenario is I would have to paint the engine valve cover possibly or get a replacement if it comes down to it.
I have found that leaving the engine running, and then using compressed air to blow the engine bay dry afterwards gives great results. Another thing to consider also with modern cars, is most have their battery’s sit in a “container” of their own where water may not easily drain from. Attention needs to be paid here to either remove the water, or somehow prevent excess water getting in around the battery in the first place.
How can be cleaned the underhood liner (engine soundproofing)? Is it safe to wet it? Steam?
Yes, you can get them wet. Usually they just need a light spray with an APC, then hit it with a stream of water and it will take care of it. Afterwards either blow it out with compressed air, or just leave the hood open for a while so the water can run out of it.
[…] did some research in terms or how to do it, this site was helpful and I was happy with my results: How to Detail Your Engine Bay – Detailed Image There is also other detailing tips on that website. Join AveoForum to remove ads – […]
[…] How to Detail Your Engine Bay – Detailed Image i followed this, i just put a plastic bag over the alternator and distributor to be safe, and your cone filter if you have one used simple green (from any auto parts store), but i believe any apc will work, just dont let the degreaser/apc dwell too long if youre working in the sun used ez brush to agitate and get to deeper spots, rinsed off lightly with hose after i scrubbed everything, and wiped down with some 303 aerospace […]
[…] show you? I follow this write up using similar (cheaper) products that I can buy at autozone. How to Detail Your Engine Bay – Detailed Image Reply With Quote + Reply to Thread « […]
This article couldn’t have come at better time! I’ve been putting off cleaning the engine due to lack of knowledge on the subject, but thanks to this post I finally have the confidence to tackle it. Thanks again, Todd!
Thanks for putting together this awesome guide. The parts recommendations are great. I’m going to detail the **** out of my engine bay this weekend!
One question, can you wash your engine bay with the engine on or off too? Any pros or cons? If it’s on, how do i cover up an aftermarket intake? Alternator is fine to cover up while running too?
Your best bet is to detail the engine while it’s cool…otherwise you risk spotting and staining, or potential damage caused by cold water on a hot engine. Personally, I’d rather take the safe method.
[…] […]
FYI On LS motors (LS1, LS2, LS6, LS7, etc) the knock sensors are below the intake manifold and WILL collect water if you spray in there. It is a bad idea to hose down an LS motor near the intake because how the knock sensors are designed. That said if you use your head with respect to pressure and direction of water flow you will be fine.
Nice article BTW.
Thanks Jon, and thanks for the important tech info on those motors.
Awesome write up i detail cars at a dealership but mostly deal with new cars which have no need for this but i was wondering if this method would work for a 1999 honda civic ex or if there are extra precautions? And again thanks for the usefull information!
That should work just fine. Since you work at the dealership, you might want to chat with one of the mechanics to see if there are any specific areas on that car where water should be avoided.
I have a 2010 Acura TL AWD and i was wondering if there was anything in particular i should be covering?? from your detailed guide doesnt look like you covered anything on that vehicle. Thanks!
John,
After looking at the engine compartment of my 2012 TL, it doesn’t look like you’d need to cover anything because it’s all already covered! Just use good judgement and you don’t need to flood the compartment with water.
hey todd what would the procedure on a 92 dodge dakota v8 be? anything i should worry about?
Todd, I bought a used car that was kept very well inside and out with the exception of the engine bay which has an exposed aluminum block that has a bit of corrosion on it, from reading around I think I pretty much have to deal with it, but if there was anyone out there that knew how to get it off it would be you! Just wondering if you had any thoughts or suggestions, everything else cleaned up so nice and the look is really killed by the look of the engine…
[…] For a step by step guide check out Engine Detailing Guide. A similar guide with pictures is the How To Detail Your Engine Bay article by Todd Cooperider and we have more articles here (engine bay articles). Hope this helps! […]
I have a ’97 Merecedes Benz E-420. Had a power steering pump that leaked and got on the drive belt, when started to break down. All parts replaced (including the upper radiator hose, which had a small leak from the belt fraying and hitting hose), now I want to clean the engine compartment. Can I follow your basic instructions with the cleaning solvents above?
Hey I just was gifted a 1993 GMC 1500. Yeah I know, “why detail it’s engine bay?” Well. I just want to keep it clean and from rusting as long as I can. So I was just wonder if because its older should I avoid using a spray hose and just use a damp cloth or something? Thanks!
Hi,
Wonderful Post. I own a 2001 Honda Odyssey. Is there any special precaution for this model? Any information/guidance will be of great help.
RK
[…] This Post has some great instructions and information on cleaning your engine bay. […]
Todd Cooperider working on a Honda?!
Lets not forget coil packs!
Audi S models with the red coil packs
Gm 4.3 vortec cap and rotor
VW late 90’s thru mid 2000
Ford 2.0, 2.2 focus 5.4 triton motors
Flat head 4cyl where the plugs are on top.
In the 5000+ cars I’ve done never had an issue other than coil packs. Food for thought.
Any tips to clean off the powdery white oxidation on bare aluminum and magnesium? (Heads and valve covers).
I am planning on cleaning my 2002 Ford Expedition but unsure what I need to cover up to get started. Everything else seems pretty straight forward but I don’t know where I need to start by covering up the components. Could you help Todd?
My ’77 Corvette has recently gone through a 10-year, frame off, restoration. Some of the exposed metal in the engine bay, such as the master cylinder cover and the heat riser for the carburetor, are steel that has been painted silver (or aluminum). After just a few months, a hint of rust is starting to show through the paint. I don’t want to spray paint these while they are on the car, and I don’t to remove them either. Do you think spraying high-temp aluminum paint on a MF cloth would allow me to freshen the paint and cover the rust? Can you recommend another technique?
Daniel – Unfortunately this is an area we are not well versed in. We would highly recommend contacting a body shop or someone who is really good with metal work or painting. They may be able to help you much greater than we can. I apologize that we could not be of more help and if you ever have any detailing questions please let me know!
We made the mistake of driving during a light rain near the coast in a 2003 Saleen Mustang that we keep for showing, the salty road spray must have blown around engine compartment, any tips for removing this salty residue and eliminating the oxidation on the aluminum casings?
Hello and good morning. My grandfather passed down his 1989 Ford Tempo GL to me about 5 years ago and have kept it in pretty good condition, especially the interior which is all original. One thing I have never gotten around to doing was detailing the engine bay, simply because of the fact that there are so many wires around the engine (few of these are from aftermarket parts; car alarm and autostart system). I know I should cover the alternator and air filter, but should I put much attention to the wires or will I be okay as long as I don’t have a strong stream of water? I would also appreciate any extra tips or advice on this particular vehicle, thank you.
Thank you for this blog.
How about cleaning under the plastic engine covers that’s covering the engine block in most modern cars? I detailed the engine bay of my car, then realized I could pop off the engine cover. It’s a mess under there. Is it safe to use the above method to clean under the cover?
Excellent job! Would using this method the same way be safe for an 07 z06? Outside of the alternator and filter, there seems to be a lot more exposed electrical parts in the z06 compared to this Honda engine. It could only *appear* that way…