How The Compounding To Final Polishing Looks
by Eric SchusterEvery now and then some people will ask me what it takes, how long, what it should look like, etc. when it comes to paint correction work. Many factors apply, but the results from each step should have a relatively uniform look.
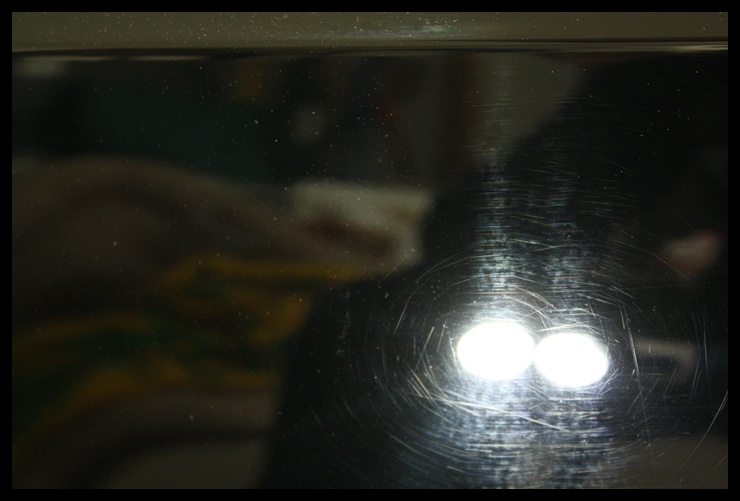
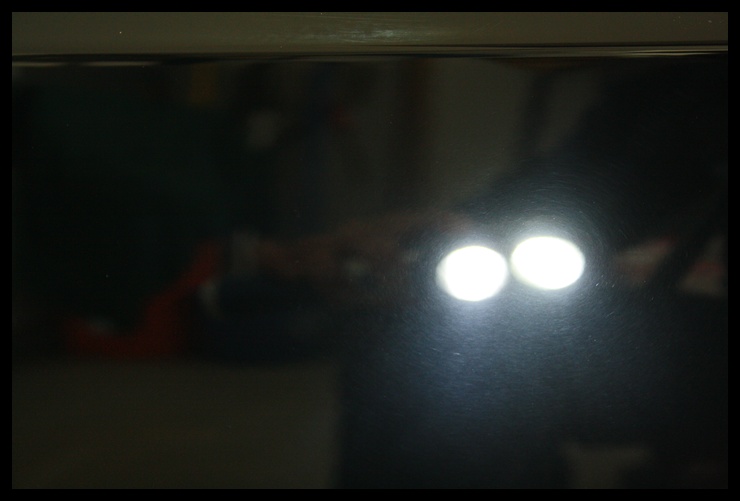
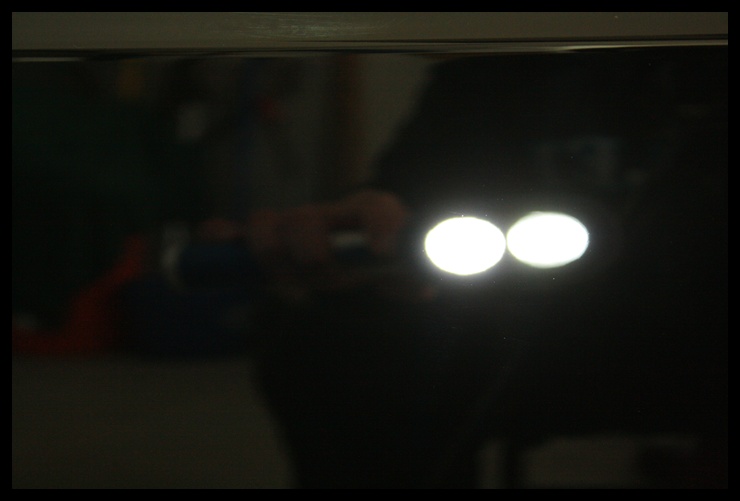
What I mean by that is after compounding, the paint should look a certain way – HAZY. After polishing, then paint should not have any haze to it at all, and be left with zero straight-line scratches, swirl marks, or faded paint. Below is an example of what I mean:
Starting condition of the paint after washing and claying the paint:

This is what the paint should look like after compounding away all the defects. Now, different compounds will yield different results based on a few factors such as color and hardness, but the general look is this:

This is what the paint should look like after polishing the paint after compounding it. It’s free of defects such as scratches and swirl marks, and is giving off a high gloss and luster.

So from start to finish the process is the following:
- Wash to remove loose dirt
- Clay to remove bonded dirt
- Compound to remove deeper scratches and defects
- Polish to remove compound haze and restore gloss
- Clean paint
- Protect paint
Related Posts
- Envious Detailing: Menzerna Fast Gloss Review
- Polishing Products Part 2 – Preparing For Polishing And Preparing For Protection
- How Do I Choose the Correct Pad for a Specific Polish?
- What’s The Point Of Polishing? For Those Who Think All Of The Swirls Will Come Back
- Video: Menzerna Heavy Cut Compound 400 | How to Compound Black Paint


thank you, good for beginners like me
How do you clean and protect the paint as in the final steps listed above? I’m guessing sealant to protect?
After compounding and polishing, do you wash the paint to remove the dust and polishing oils? How do you keep from introducing more defects to the paint? How would you clean the paint?