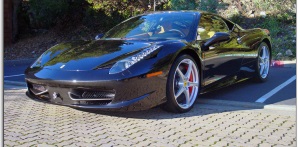
About a month ago I was given the pleasure to travel just north of San Francisco to Tiburon and work on this stunning Nero Daytona (black metallic) F458. This being one of the first deliveries to the Bay Area, the car had already clocked a staggering 300 miles on the odometer. Although, as we’ll see from the pictures, the owner of the car does in fact drive it! The cards for this car played out as follows: A proper wash and decontamination, a mild polish over the course of a day and a half, some interior cleaning, engine bay detailing, and a couple coats of wax to top everything off. In total, there was about 15 hours put in to the car over the course of two days. As many professional detailers will reiterate, YES even brand new cars can benefit from a proper and thorough detail.
Now on to the goods! The pictures:
I already knew what to expect as it’s been well documented from various articles on this blog how poorly Ferrari’s are prepped form the factory. So with that in mind, I began to assess the damage. Some mud splashes here and there:
General accumulation of dirt from the rain we had gotten earlier that week
And then I started finding all of the “presents” left over by the boys at Maranello! Polish residue and splatter all over the car:
… Including the engine bay!
Once my initial inspection was complete. I started with the decontamination. I always start with the wheels first. Not wanting to replace five figure carbon ceramic brakes, I didn’t use any chemical wheel cleaners, simply a medium dilution ratio of Chemical Guys Citrus Wash and various brushes.
And to get rid of all the polish residue found around the car, I used a boars hair brush, and diluted Optimum Power Clean.
The car was then washed with the two bucket method, and dried. It was then time to inspect the car in the sunlight. I was waiting for the holograms to show themselves!
With the initial in-sun inspection complete, and the car properly decontaminated, I got in the car to pull it in the garage. What an amazing view the one analog dial, and two LCD monitors provide!
I then inspected the paint using various lighting sources from 1000w halogen lights, to 120 lumen LEDs, to the Brinkmann Dual Xenon Light.
I then started to test polishing combinations. I ended up going with a 3-step process that included the PC 7424 XP and Surfbuf Pads with M105, followed by Meguiars 205 with a Tangerine hydro tech pad, and finished off with the Rotary and Menzerna PO85rd with a Black finishing pad.
Here are the results under the same lighting conditions:
Using the line down the middle of the hood as a natural 50/50 indicator and the 1000w halogen lights, you can see the left side of the hood is finished off, and hologram free, while the right side still has plenty of holograms to be removed (towards the top of the picture).
Once the half of the hood that I tested combinations on was completely finished down, I pulled it out in to the sun for the true correction results.
Remember, this is what we were starting with:
Ferrari must have had detailers in mind when they made the little triangle that used to be what the mirrors on the F360 and F430 were mounted on gloss black. I was able to squeeze my buffer on to this small panel to make sure the correction of this area matched the rest of the car.
After:
By far the most heavily damaged area of the car were the rocker panels. I guess whom ever prepped this car after paint gave up after wet sanding and very heavy compounding!
Some careful work with a 3″ pad, extra blue painters tape, and steady polishing yielded the the results I was after.
This is the area between the 3rd brake light and the “F E R R A R I” badge looking a bit messy:
And then it was all cleaned up:
The rear bumper and license plate area was also fairly heavily damaged.
And then after:
Once the polishing was complete I moved on to the exhaust tips.
The wheels were polished with an all-in-one, and then sealed with a spray-sealant.
The engine bay was finished off as well:
The interior was vacuumed. The gorgeous seats with its tan leather and black daytona inserts was protected with Leatherique Pristine Clean, as well as the rest of the leather hides.
And finally, the finished product. After 2 days, 15 hours of work here is the final result:
Thank you all for taking the time to look at my photo journal of detailing this outstanding Ferrari. Please feel free to leave any questions or comments below.
Related Posts
- Full Detail and Paint Correction: Ferrari 458 Italia by Todd Cooperider of Esoteric Auto Detail
- Lamborghini Gallardo: 24-Hour Restorative Detail by Todd Cooperider
- Ferrari F40: 60 Hour Restorative Detail by Todd Cooperider and Craig Reed
- Italian Excellence: Ferrari 430 Scuderia Paint Correction and Detailing by AutoLavish
- Hybrid Polishing Process featuring a 2004 Dodge Viper
