Clear Film Removal
by Brian GuyI truly have a love-hate relationship with clear-bra’s. Clear-film is without a doubt the best protection you could give your car. It protects the paint 100 times better than any coating, sealant or wax ever can. However, I’m not a big fan of clear-film because it takes away from the natural luster that true paint offers and limits the amount of detailing to those portions of paint work.
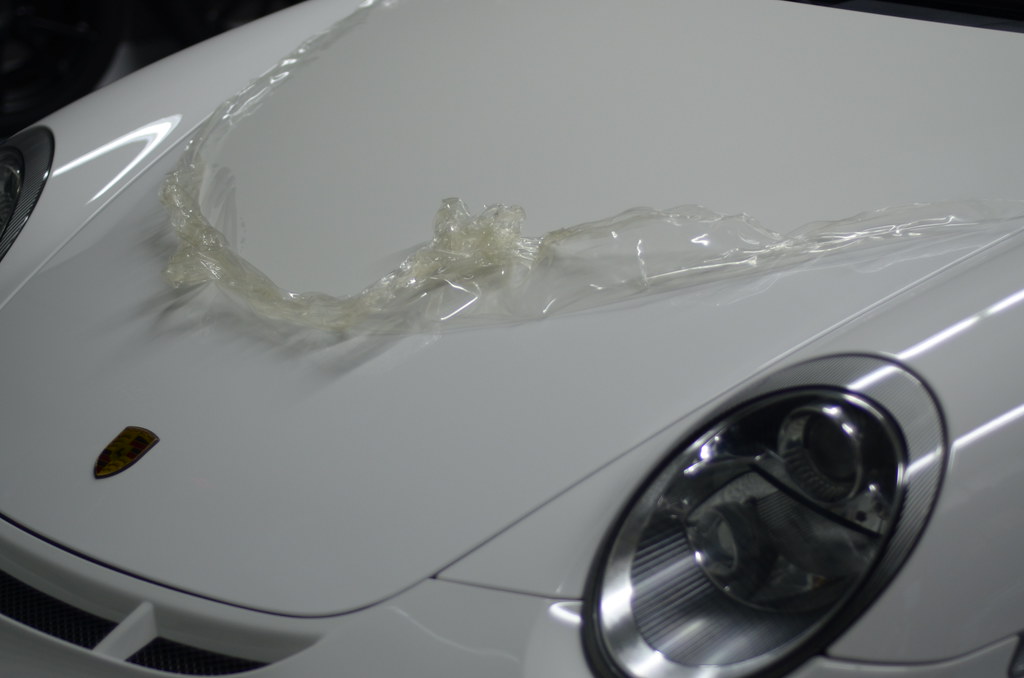
PPF does not last forever. Clear Film a.k.a. Clear Bra for the most part, has about a 5 year lifespan on average.
Before Removing Any Clear Film: Determine the Condition
If the condition is good but showing signs of needing care, most all clear film can be polished with light/medium aggressive foam pads and a mild polish. Film is correctable (to a degree) to bring back some gloss (clean, protect, and extend the life) and also light surface scratches can be removed via machine polishing. If the condition of your film is great, then keep up with it! Film is a great investment and worth protecting.
Poor Clear Film Condition
It’s difficult to justify the amount of time it will take to remove, therefor it is also hard to determine a price during a quote. If we looked at all film the same without determining the condition (and just toss out a random price), it could very well come back and give you a run for your money. When I see clear film that is in very poor condition, I’ll usually ask the customer a few questions.
- How long has the film been on the car?
- Did the film come with the car during purchase (Manufacturer install)?
- Is the car left outdoors or garaged?
- What kind of clear film is it and who installed it?
- How has the car been maintained, detailed and how many times?
- Do you plan on installing new film after the removal?
- Was the vehicle purchased from out of state? Which state?
- How many others owned the vehicle before you purchased it?
These are just a few questions I may ask to have a better idea of what I’m about to be dealing with. Clear film in poor condition or way outdated is usually pretty noticeable. You could also determine by touch, if the clear film has a tacky feeling to it, it’s ready to be replaced.
The Removal of Completely Outdated Film
Having a customers complete understanding before any removal is done is very important. You really can’t put a figure on the amount of time it will take and the situations that you could be faced with. However, being prepared with the right products and tools will help the suffering of a horrible clear film removal experience. Having a Steamer, heat gun, 3M adhesive remover, clay bar, IPA (alcohol), plastic razor blades and a prayer are good place to start when getting ready to deal with the worst.
Here is a photo of the very respected Porsche! Most of all Porsche’s come with clear film on the side flares because they extend out and are very susceptible to road debris. They’re often overlooked for years. In this particular photo the film is over thirteen years old and has never been replaced. The film was very tacky to the touch and did not want to come off. An abundance of patience was needed to get the film off without damaging the paint. In the picture below we can see a number of things happening. We can see how the film is breaking down in layers, deep scratches, not coming off in one piece, and left over adhesive residue. In the blurry portion of whats on the floor, we can see small the dime size chunks it’s coming off in.
A steamer and some 3M adhesive remover is your best bet in these situations. I also tend to use denatured alcohol. I find it helps after the adhesive remover, or your IPA solution. The film is not going to come off in one section, so it’s important to work only the small area you’re focusing on.
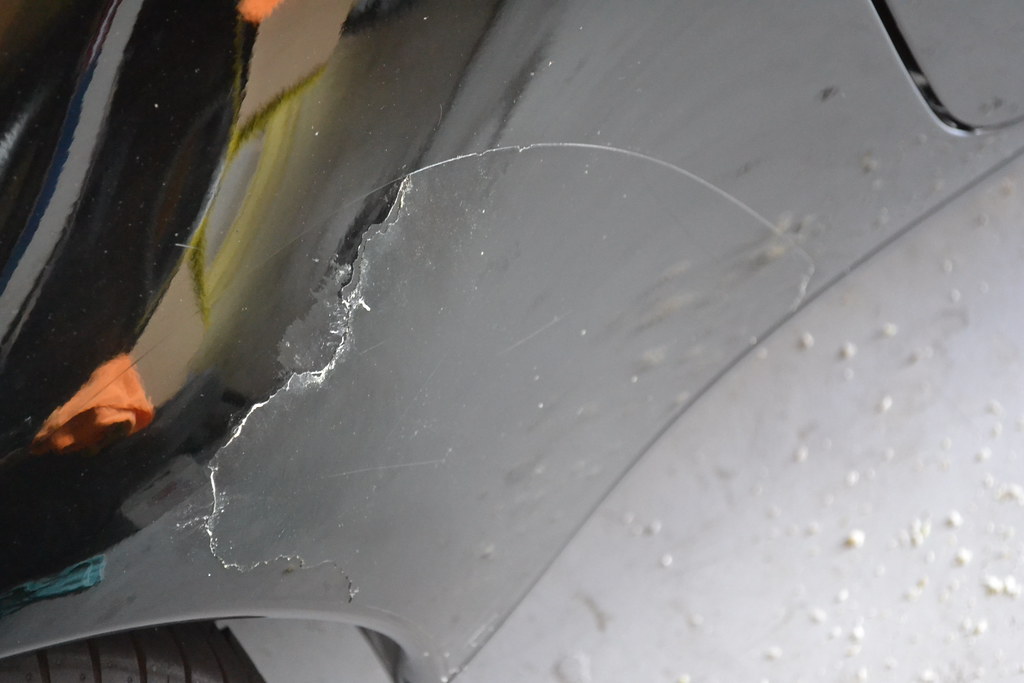
After it was all said and done….
You can see the amount of abuse the paint was still getting due to the failure of the clear film. That was a fun detail as we can see below, I ended up having to wet sand this area down due to the age of the vehicle and the improper machine polishing on the painted side over the years. I was actually able to run my finger over the line and could feel the height difference on the clear coat. The paint was higher on the section that had the film, after the wet sand and correction the paint meshed together very well and the car came out amazing!
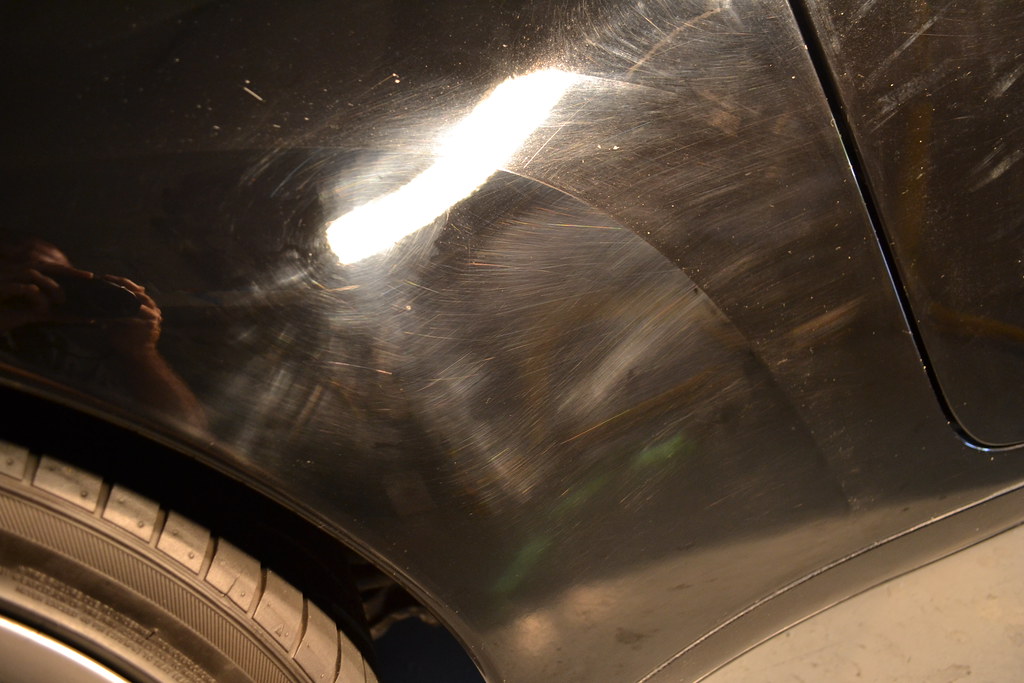
More worst case Clear Film Removal
- When getting ready to remove film, if it’s a nice hot day, park the car outside for an hour or so. This will help warm the film up and allow it come off a bit easier.
In the picture below we have a case where the film came off in one section but the paint did not want to let go of the adhesive. Something like this is easier to tolerate and can be cleaned up much faster. Some 3M adhesive remover followed up with the clay bar is ideal. This particular vehicle, through my question asking, had this film installed by the dealer and was an out of state purchase. The vehicle was purchased out of New Jersey and spent a year sitting under trees before making it’s way to Orlando Florida for this sunning day clear film removal and detail. I can pretty much guarantee the clear film was over it’s 5 year life span and did not get the attention it needed.
Replacing Clear Film at the Recommended Time
Like I said above, often times these sections of film get overlooked. Replacing them as needed will make for a much easier and very less time consuming ordeal. Not to mention it keeps the car looking it’s very best at all times! Detailing companies should make it aware to the customers but also make sure the customers get their money’s worth out of the it.
In the picture below we have a car that is just that case. The film has meet its lifespan and has turned a dingy yellow. To allow the film to age more, would only lead to issues like I showed above. This is film removal as it should be! The paint looks amazing, everything looks amazing but this clear film on the 09 Aston Martin Vantage. This car had front end film that still looked great. But these rear flare sections had most likely been on since day 1.
To get these sections of clear film off I set my heat gun on low at about 12″ to 15″ inches away moving it up, down & side to side for about 15 to 20 seconds. Do NOT hold heat gun in the same place, keep it moving. Once the section is warmed up the film will come up rather easily. Start in a corner, get the little section lifted and continue to pull the film towards you. At no time do you try to peel it like a banana, sorry, that is the only way I can think of describing it right now. You want to constantly pull it towards you (as shown in the picture below). This will help lift all the adhesive from the surface. By doing like my well described banana approach, it would end up leaving a lot of sticky residue on the paint surface. Thus making it more difficult to clean up after the film has been removed.
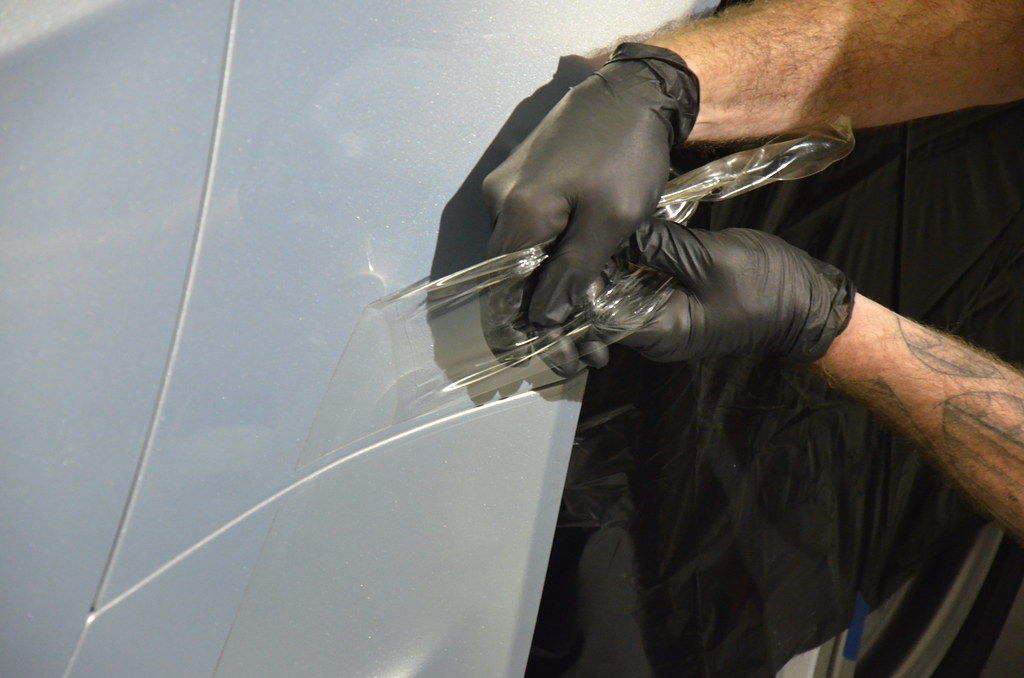
Gloves
Gloves are very important in order to save your knuckles when doing larger sections. As you are grabbing and pulling the film toward you, you will find having a good grip is key. When taking a few seconds to get your composure back be sure to roll the film over on itself and not allow the sticky side to touch the paint again. The lager pieces can be rather trying at times, but to avoid bloody knuckles or blisters a good set of gloves will help.
Most Of The Time
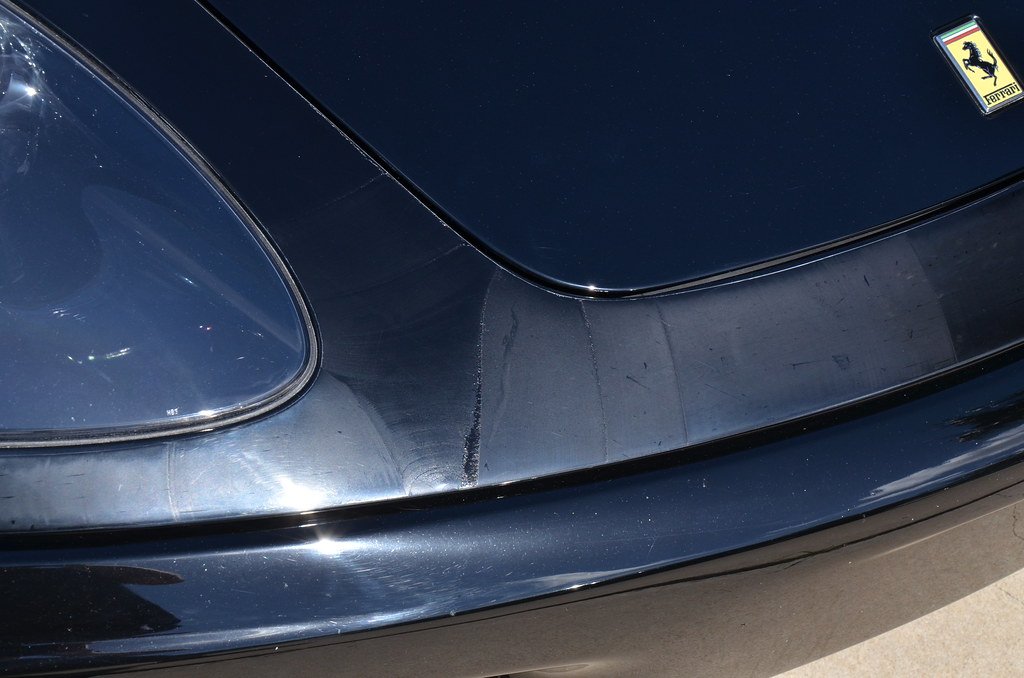
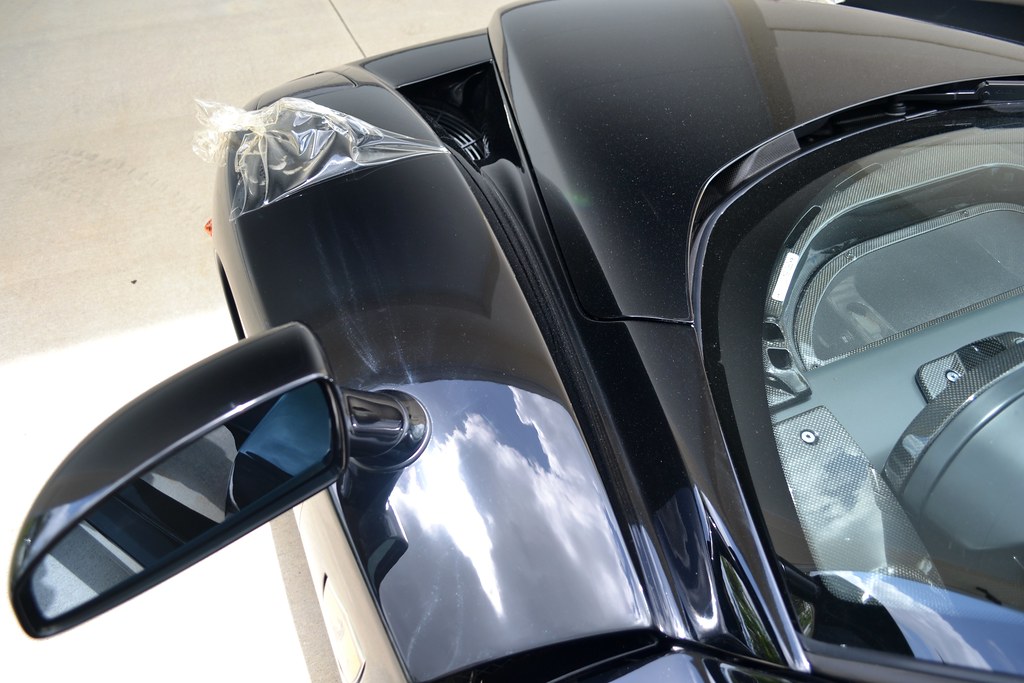
Again, as in the picture below, not all the time does clear film just come right off very easily. I would say a good 90% of the time, some type of issue will be faced. Ferrari 599 GTB – The bonnet film was coming off with no problem and the quarter panels above the headlight lenses, not so much. Honestly, I would say this was caused from one of two things. 1) possibly the prep & 2) the car had been machine polished with disrespect to those small sections, but not so much the large piece of bonnet, if that makes sense.
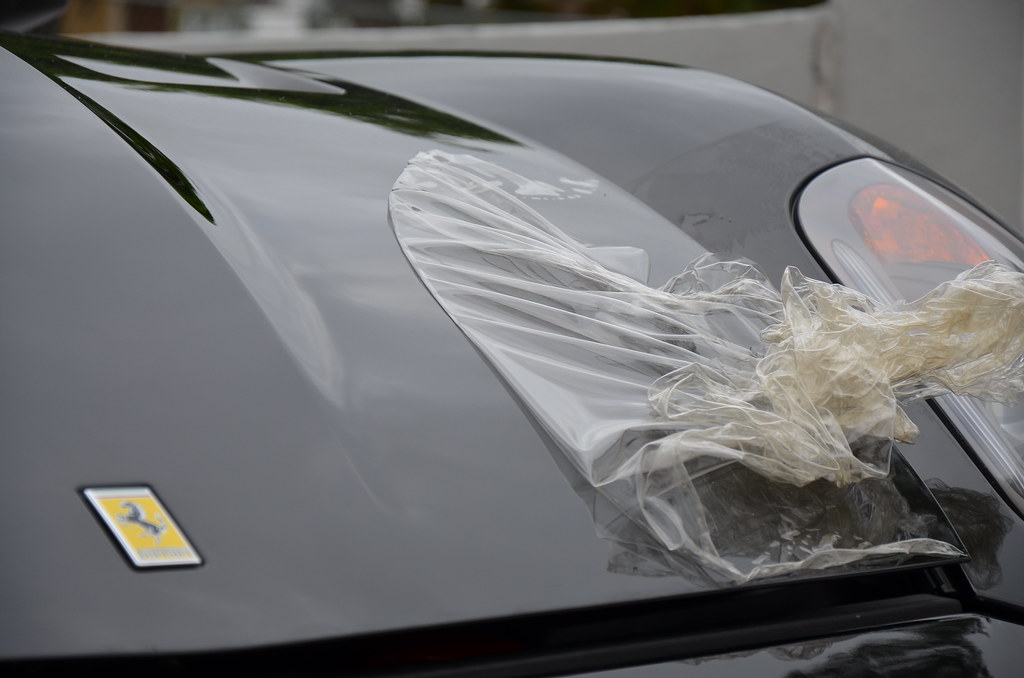
Large Sections of Clear Film Removal
On these very large sections of film I like to loosen up all the edges first (I believe it releases some tension from the stretch). Having all the edges done first will also allow you to work back and forth increasing your work space. And you could find that your having better luck from one side to the next.
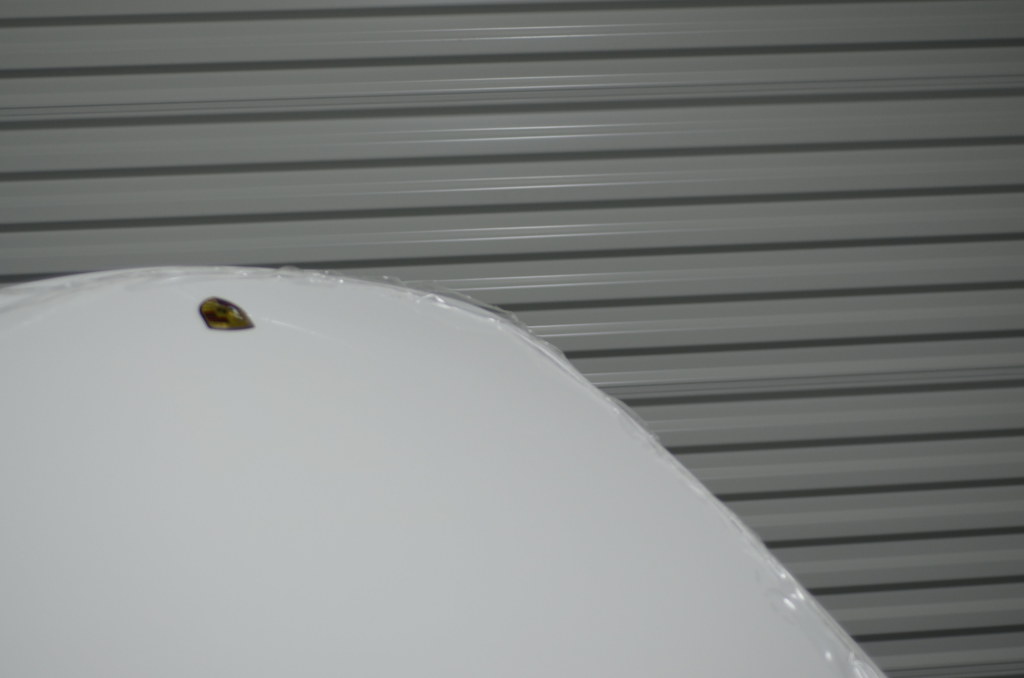

Benefits of Clear Film
Film is by far the best in paint protection to date. It may not be the best in looks as far as detailing is concerned, but you just can’t beat the protection it offers. I wouldn’t dream of tracking a car without it, which was the case for this white Porsche GT3. Not only track cars but also your daily commute vehicle. Things happen, a shopping cart might bump you, you may brush the garage every now and then, stuff falling out of a large semi truck, flying off the track… who knows? But things do happen while driving and we hate it when our paint gets damaged.
When these light mishaps happen and the vehicle has been protected with clear film, it helps you sleep a little easier at night. It may be a costly install but it beats the price of repainting anything.
In the picture below we can see some white scuffs that were unable to be polished out (they were pressed into the film). Luckily we can simply remove it, done!!! Problem solved. No harm to the paint, no trips to the body shop, certainty worth the investment!
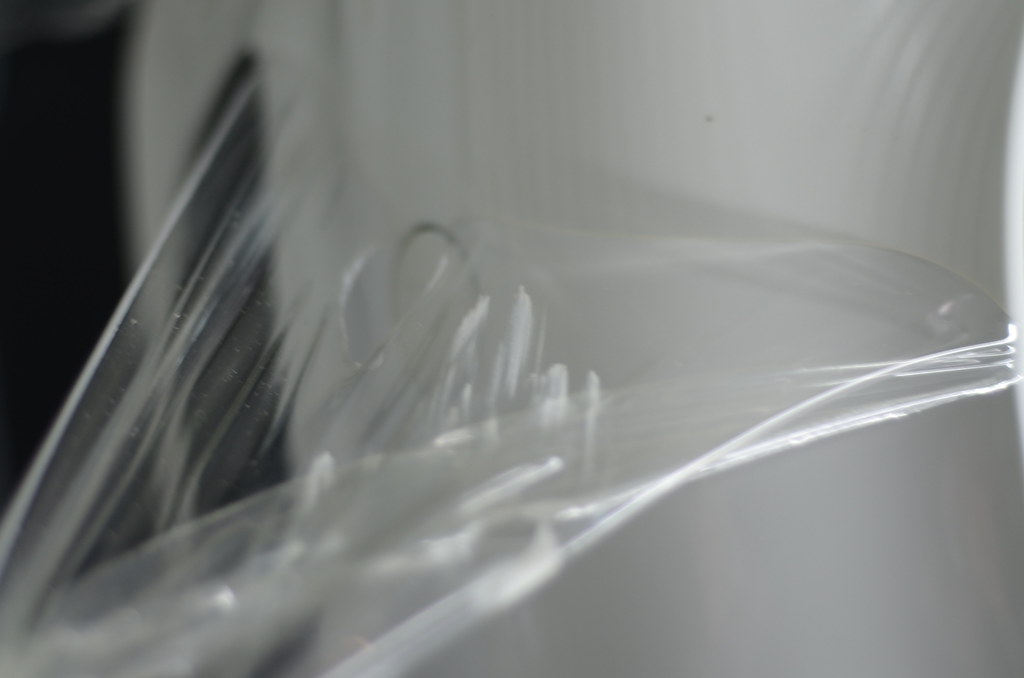
Clear Film Removal on Extremely Expensive Vehicles
All the previous practice gets questioned when removing film from exotics, classics or anything of intense value.
As an active paint lover and a passionate automotive detailing enthusiast, Nothing is more nerve racking! A million things go racing through your mind before getting ready to remove clear film on such vehicles. That to me means, you’re getting yourself focused.
For safety sake I would recommend replacing the film every two or three years. Having the clear film fail or gain to much age on such paint surfaces could be a very horrible thing. Owners look to maintain these cars with top dollar spending/products for expensive vehicles, and if the car(s) is being driven, a clear film is a necessity. I would recommend no clear film at all for vehicles that are being shelved, stored, etc.
So where do we start when removing film from expensive vehicles? I would recommend starting at the lowest portion of the vehicle and the lowest portion of the clear film in the most discreet area first (this would be the test section). You would not want to start in the most obvious spot and have something horrible happen. Then I would measure up my sections and work from the smallest piece to the largest piece. Set the car outside on a hot day for an hour or two, have all your products and tools ready and be prepared to take your time.
To learn more about Clear Bras (PPF) here at Detailed Image, please review:
- Do I Really Need Paint Protection Film (PPF) aka Clear Bra by Ivan Rajic
- Which Paint Protection Film (PPF) Is Right For Me by Ivan Rajic
- Questions About Clear Bra Maintenance by Todd Cooperider
As always, thank you for checking out this article on clear film removal and a few of my examples. These are my own experiences with the removal of PPF. One of the key things to removing the film is finding a way to leave the least amount of adhesive residue behind. Take your time and pull the film towards you. Don’t pull to fast and try not to pull paint up. Get the customers full awareness and consent, ask lots of questions and have all your products and tools ready. I hope some of this information will be useful to you. If you’re located in Orlando FL (or Florida area) and have a few questions about your film? Give us a call! We are here to be of service.
Buy Products From This Article
Purchase the products used in this article individually or in one convenient package here!


Looks like removal of ppf can be a real pain in the you know what. Have you ever removed film and paint has come off with it ? Also how did you learn to install ppf is there a place to go to learn how to install or do you just jump into it and get better with time
Felix,
Yes, I’ve had paint come up before. Depending on the age, location and where the film is laid on some cars cars… It could sometimes be guaranteed to come up. I don’t install film currently. But from what I here… It’s something that you get better at with time and practice.
whats your number buddy ?
Check out Brian’s website for contact information: http://www.aowheels.com/
I would also ask the customer if there has been any repainting done to the areas. I’ve found that out the hard way… paint will come off with the plastic guaranteed!
Thank you for the informative “How To”
I have posted a couple of times on DI regarding care of a clear film and have tried the light polishing you suggested but as you pointed out a film takes away from the natural gloss and depth of a paints finish, This has become more and more obvious with mine it has been on the car for about two years and while the PPF still offers great protection is not looking as pristine as I would wish (my car has a two stage white pearl paint). I have been religious in the upkeep using the recommended cleaner and enhancer in addition a light machine polishing, claying and applying Cquatrz about a year ago.
The car is in Florida and is not garaged so it takes a beating from the Florida sun 300 days of the year.
Could I try a more aggressive compound as one last effort to extend the look of the film?
In addition what are your thoughts on the 3M colored film as after this film comes off I was tempted to go for a color change of if I stay with a clear film your recommendation on the best brand out there.
Thanks
Steve
Have safely removed 99% of my clear bra from my 98 black Corvette. There remains a small portion that is giving me fits. Have tried various citrus and 3M removers plus heat and plastic razor blades with no success. Any/all thoughts and comments as to how I get the remains off are welcome, thanks much! Joe
Joe
have two holes from hitting something in my garage, can these be fixed or do i have to remove the entire PFF. car 2009 corvette LS3.
Len – I would recommend contacting whoever installed your PPF. Most likely it will need to be reapplied to the area, but they are the ones who can assess the situation and help address what is needed to fix it.