Ask-A-Pro: Orange Peel Part Two of Two – How to Rid Your Paint of it.
by Marc Harris & Jacob BunyanYou’ve likely seen our article laying out what orange peel is, how it is formed, and why it is a problem in Ask-A-Pro: Orange Peel Part One. In this article, AutoLavish Fine Automobile Detailing will address minimalizing orange peel from your cars surface to greatly improve the look of the finish.
Ask-A-Pro: What is Orange Peel and How Do You Fix It? Part Two of Two.
Factory paint jobs applied by robots from the factory aren’t sanded after the clear-coat is applied. This is the opposite of what happens with hand sprayed paint jobs. Some low volume manufacturers (think certain exotic and supercar brands), and the refinishing industry (paint shops and body shops), often sand down the clear coat to eliminate excessive orange peel, dust specks, or other paint defects after painting. If your car needs to have a panel resprayed because of an accident, a good paint shop will not only work hard to match the color closely, but with work hard to mimic the amount of orange peel in the rest of the finish. Only when color AND orange peel match will the finish look nearly factory.
Please be aware that sanding in any capacity is very risky. If you question your ability, equipment, or overall skill, we at AutoLavish would highly recommend you take your prized possession to an expert. While the benefits can be huge, the risk of making a mistake can often lead to a ruined paint job that can only be fixed through repainting the damaged area.
Wet-sanding (or “color sanding” if you’re old school) is the recommend way to eliminate deep defects, orange peel, or painting defects from a painted surface. This method will ensure a more constant finish and is overall safer than dry-sanding. Needed tools and equipment include a Dual Action buffer / sander, sanding disks/paper, and a lubrication agent. While wet-sanding can be used for multiple reasons, we’re going to focus on removing orange peel in this article.
The lubrication used in wet-sanding is traditionally water, but many people will use things they feel give them a better lubricating medium like a diluted car wash shampoo such as Optimum No Rinse, baby shampoo, or clay lube. We would recommend against anything that evaporates quickly as you want to make sure your lubrication lasts as long as possible, so keep your mineral spirits and alcohol in the cabinet.
Sanding paper/disks that are often used for wet-sanding cars don’t need to be as aggressive as the types used on wood or other finishes. Just as swirls can easy be installed in your clear-coat with the wrong type of care, sanding clear-coat only requires some of the finest grits available. When looking to spot wet-sand a problem area or an entire car, we often reach first for our 3,000 grit paper or disks. Just as with polishing, it is always good practice to use the least aggressive method. While there are many bands and types of sanding paper available, I would recommend Meguiar’s Unigrit papers for their ability to leave extremely consistent finish if you need to work by hand. For disks, we’ve really been enjoying our 3M brand 3,000 grit sanding disks. They have a thin layer of foam backing which helps them to contour to body panels, and we believe they perform extremely well.
A dual-action polisher / buffer gives a more consistently inconsistent finish, which is exactly what you’re looking to achieve. The marks left after wet-sanding should look more like controlled chaos than any uniform marks. Uniform sanding marks are often a sign something was done wrong because they are usually caused by inconsistent pressure being spread on the surface. Rather than this happening, you want the entire finish to be of a uniform depth.
Says Jacob Bunyan of AutoLavish Detailing, “A uniform chaotic finish is an indicator that you’re achieving an even material removal.” This is a key to the steps to follow the sanding; properly polishing the finish. Jacob goes on to add, “Any variation in material removal may result in an uneven finish appearance. In other words, if you remove more orange peel from one area than another, the difference will stand out and will continue to be an eye sore. The goal is to achieve a uniform finish that will provide a consistent reflection.”
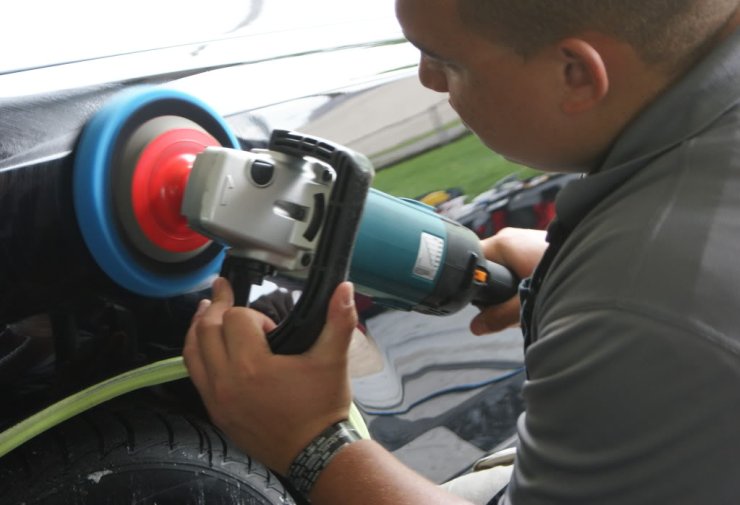
Using plenty of lubrication, the DA sander is steadily moved over the surface with only light pressure and the machine set on medium speed. Once done with a section, it is important to wipe clean the area of clear-coat and the lubricating agent used in the sanding process.
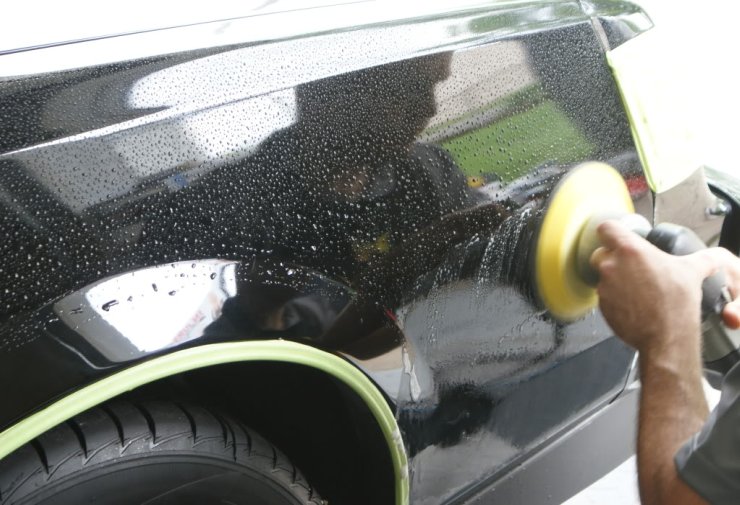
Any area that still shows gloss and shine has yet to be correctly worked. In the following picture, you can clearly see the fender flare needs to be worked further as well as areas around the fender arch. This inspection step is very important as it allows for proper assessment of the finish.
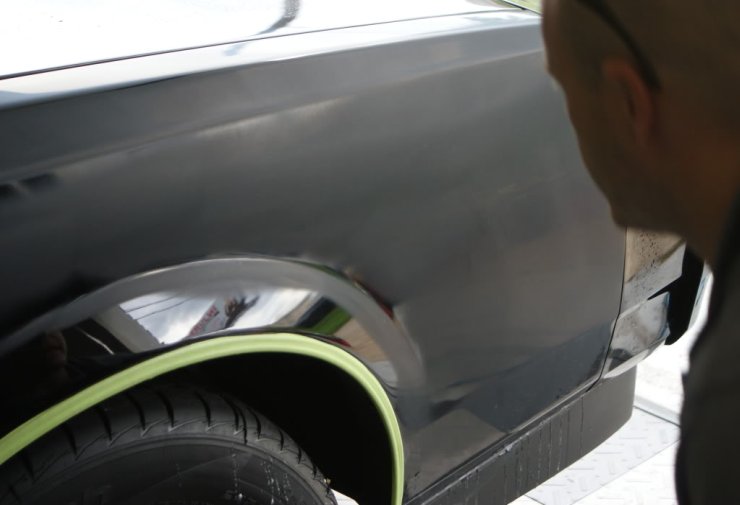
When done, there should be a uniform haze that must then be correctly polished to restore the gloss and shine. In the following picture, you’ll see that the areas formally needing more sanding have been completed, so Jacob moves onto the next step; heavy polishing / compounding.
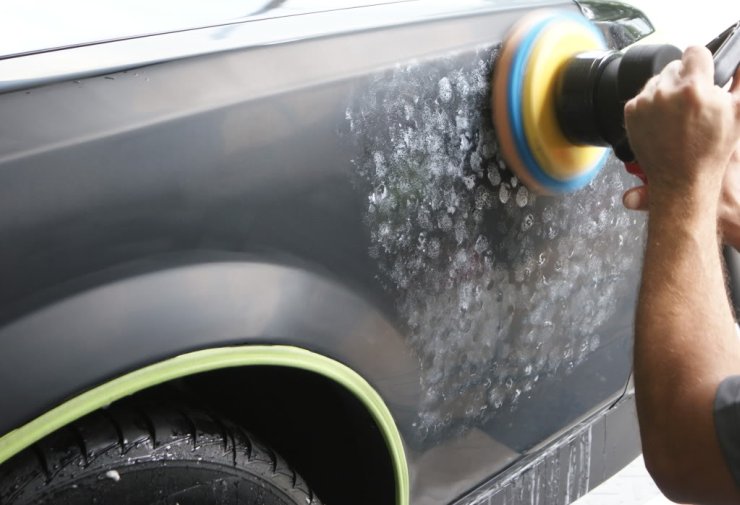
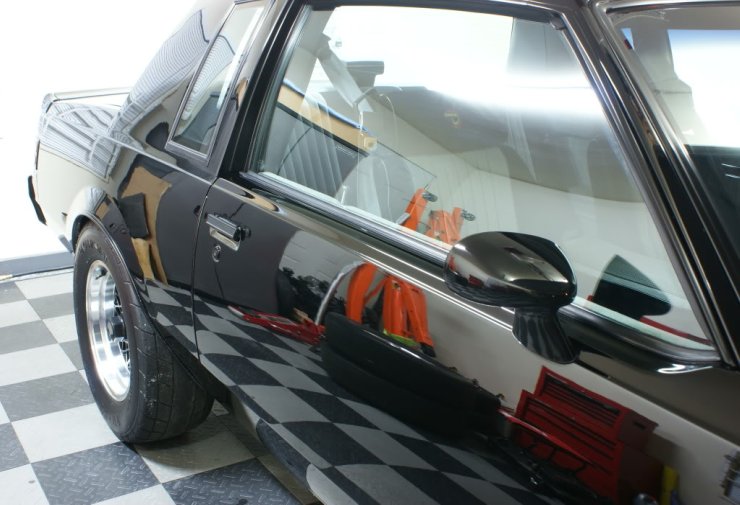
Inspecting to make sure all sanding marks on gone, the reflection is much more tight and clear.
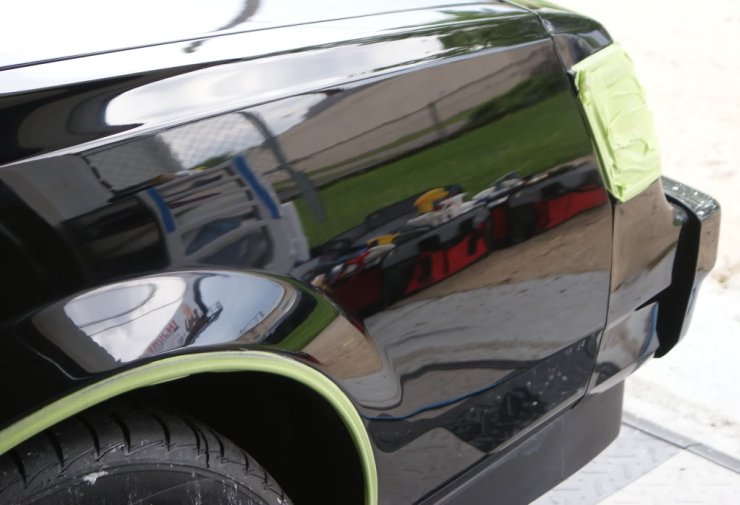
Not as easily noticeable however, is the haze from the polishing step. I moved in to further refine the finish.
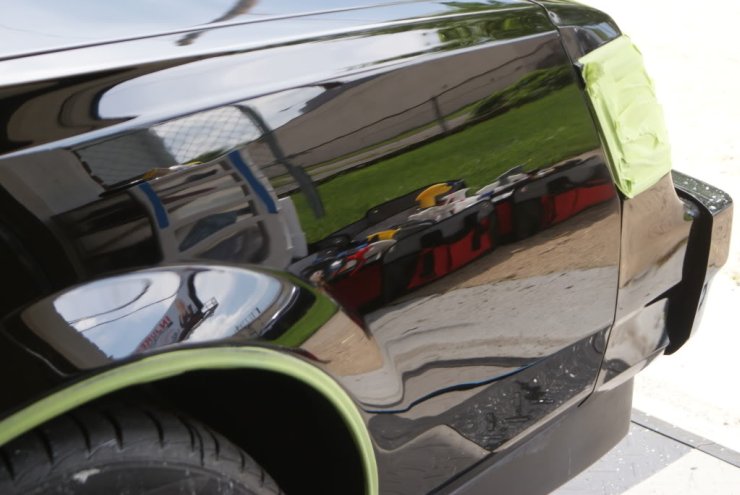
Now refined, absolute clarity and crispness is achieved.
A friendly reminder of what this started as:
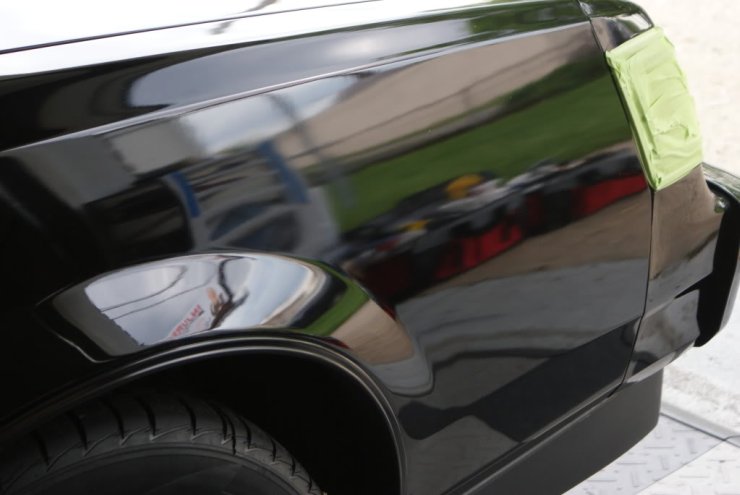
This same process was performed over the entire vehicle with outstanding results. While very time consuming, wet-sanding was able to save this Buick Grand National from the paint booth, and over-all was much less expensive than a quality paint job.
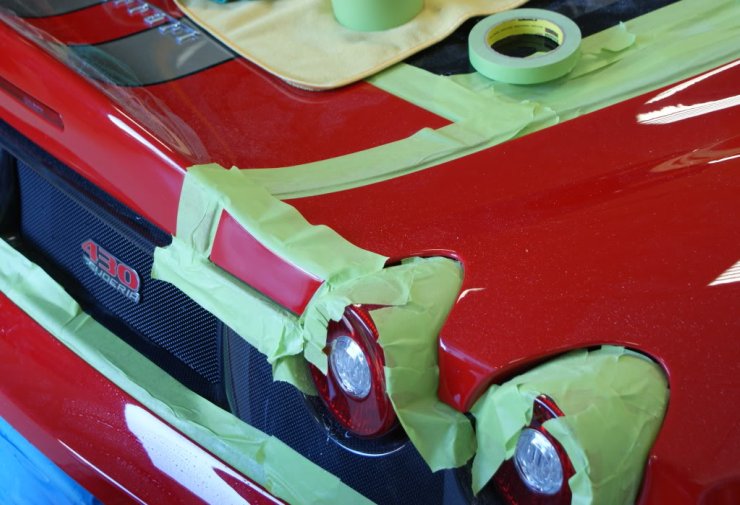
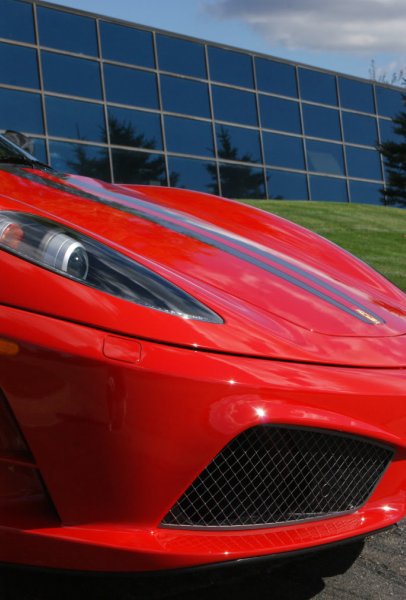
Some vehicles don’t need to be wet-sanded over the entire surface, but rather have spot areas that need the extra work. Such is the case with this 430 Scuderia. While certainly beautiful vehicles, Ferrari’s are infamous for coming from the factory needing the services of paint correction professionals. It seems some forgetful people across the sea forgot to wet-sand and polish a small section of this 430 Scud after it was painted. The “Orange Peel” was quite horrible, but only in this one small area.
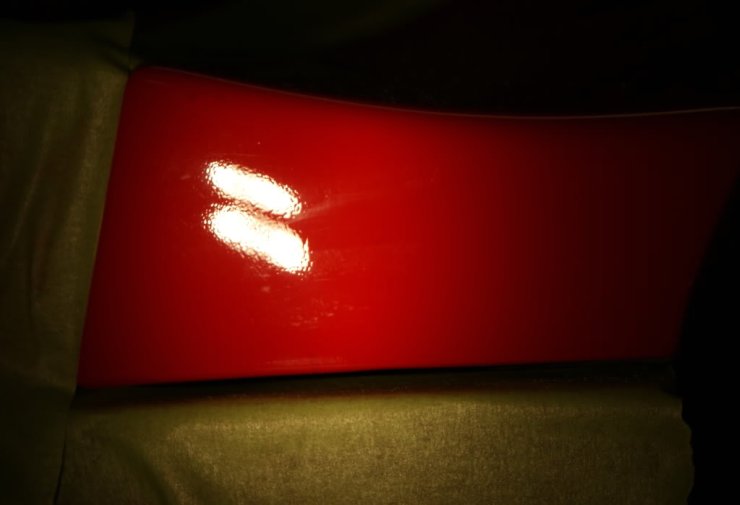
Now you can see where the term “orange peel” comes from!

Using 3,000 grit Meguiar’s Uni-Grit sanding paper and a block, Jacob gently works the affected area.
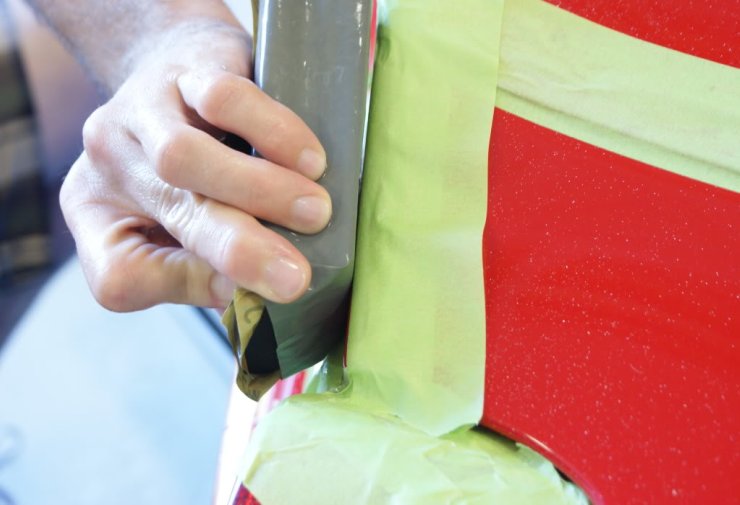
While there is more of a uniform sanding look, you can see in the following picture that the hard-to-reach edges still are shiny, which means they haven’t been properly leveled.
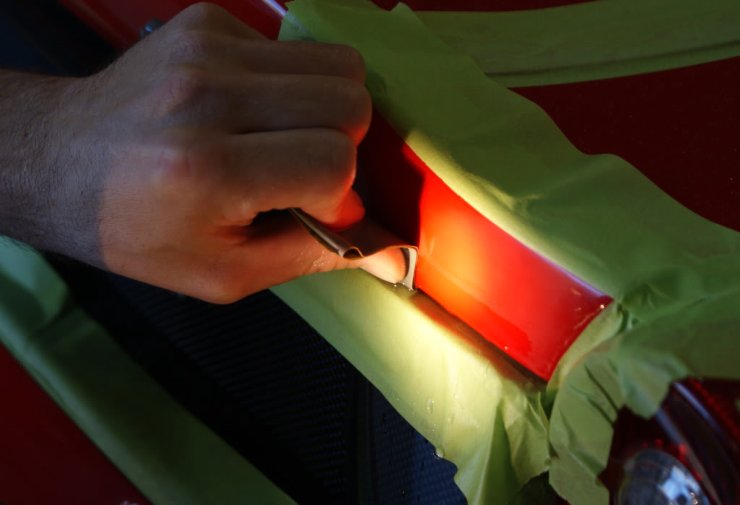
To solve this problem, Jacob very carefully had to use a thumb as the backing device for surgical precision. It is never recommended to “hand sand” or “finger sand” anything, as your digits have natural pressure points which do not allow of a uniform finish.
The next step was to polish the surface down enough to rid the finish of sanding marks. A small pad and a rotary polisher were utilized to work the small area’s hard clear-coat.
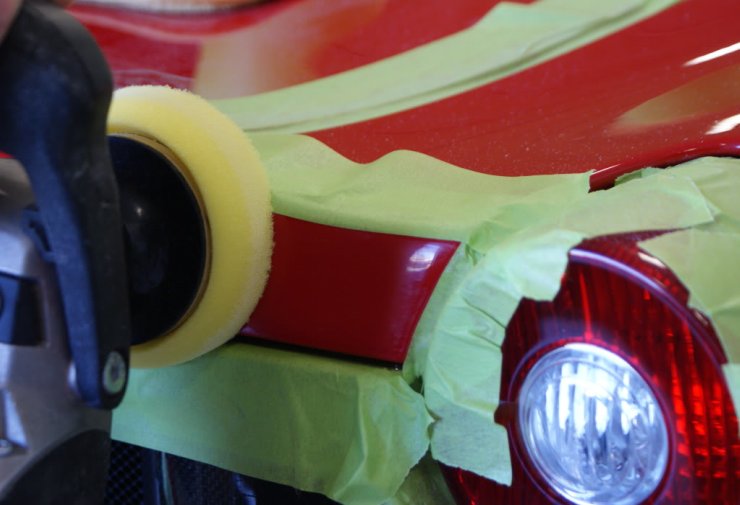
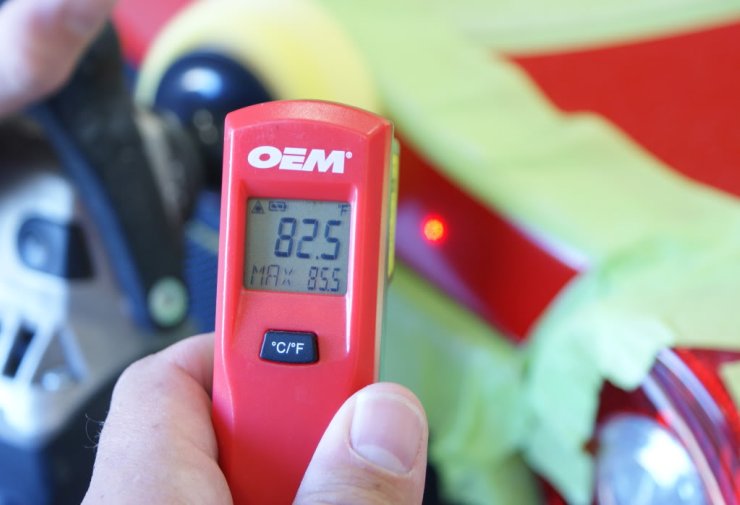
While polishing small delicate areas of a hand-painted car, safety always is in mind. The following picture shows an infrared thermometer being used to ensure no edge or section was becoming too hot. It is an advantage for us to have two people working simultaneously, as one can keep an eye on things the other cannot, like in this case, and be able to warn the polisher of any changes.
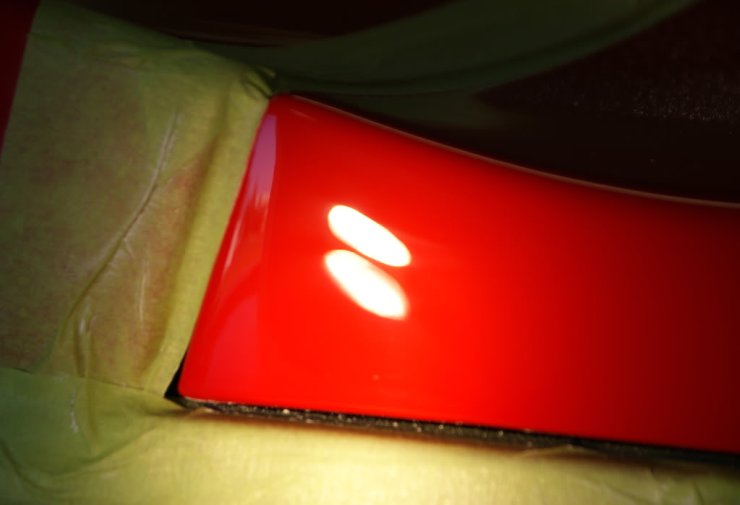
Reveling the releveled paint, the excess orange peel texture is now gone. While this section would go on to receive several more refining steps to bring the full potential from the paint, it is clearly already a huge improvement from the start.
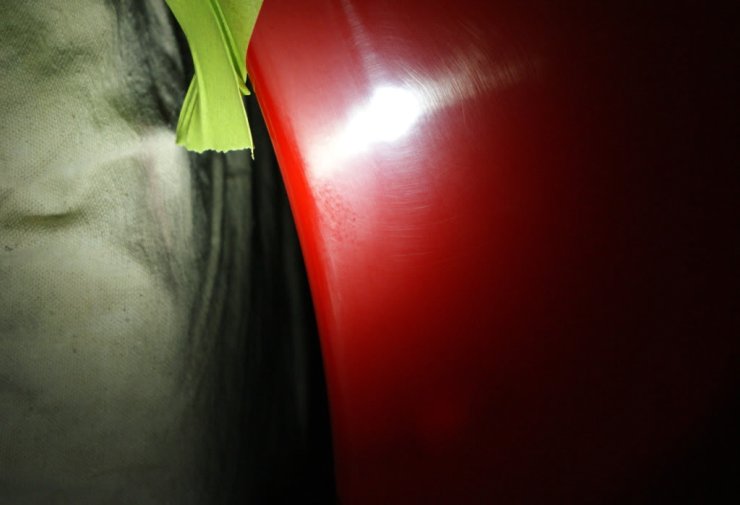
While I don’t recommend any novice to try wet-sanding, if you do decide to learn, make sure to take your time, and make sure to properly polish out the area afterwards. The same Ferrari 430 Scuderia serves as a perfect lessen as to the look of sanded, but not polished and refined finish.
Straight from the factory, here is a section that was overlooked:
After heavy polishing testing, there was a VERY clear and distinct difference as to what had, and had not been polished.
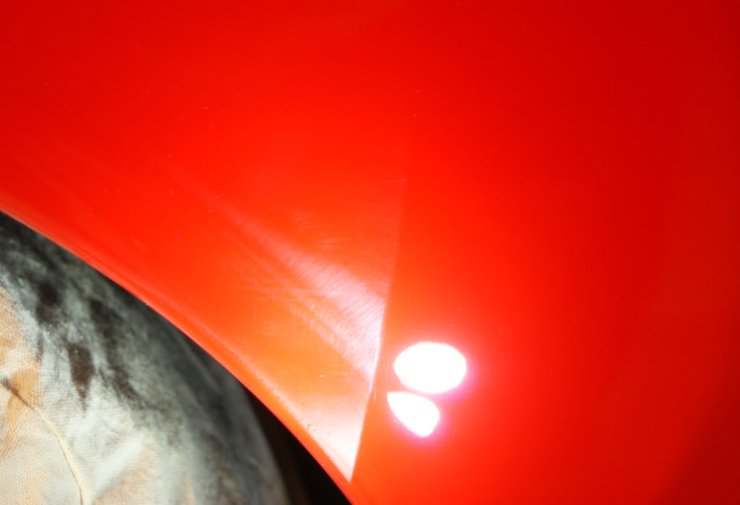
Polishing alone will NOT reduce the orange peel affect, but keep in mind that wet-sanding is very dangerous and time consuming. It seems more and more enthusiasts are discussing and complaining about the increased orange peel in modern paint jobs; something I touched on in the What Is Orange Peel Part 1 article. I hope this two-part series gives a little better insight as to what orange peel is, how it is formed, and a couple of techniques for getting rid of this unwanted look.
Wet-sanding alone won’t make a great detail, but it can certainly be one key ingredient in a successful work.

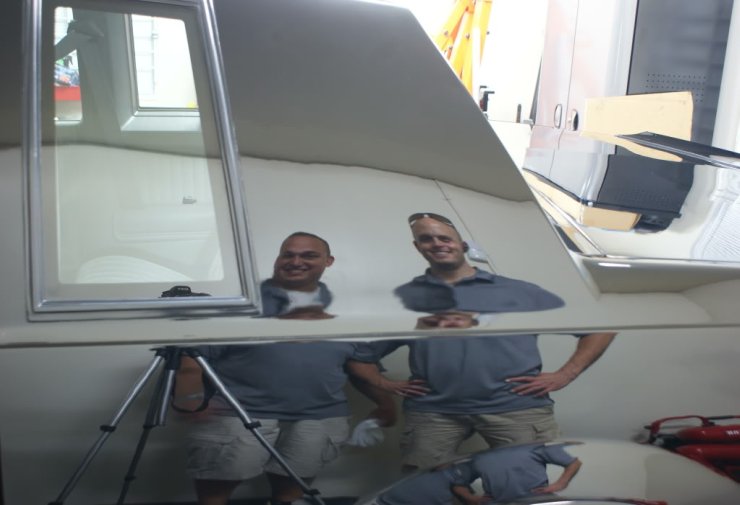
-Marc & Jacob from AutoLavish Fine Automobile Care. Local to Southeastern Michigan, serving anywhere needed.


Excellent article you guys did very good!
I guess wet sand will have to be for experts only.
Can you be so kind to revel your secrets:
1-) What polish was used with orange LC pad
2-) What fine polish was used with the Blue LC pad as last jeweling step?
Thanks
Art
Art,
Thank you for the reply and questions. I never have secrets, so let me shed a little light in two areas I didn’t shed enough light.
1. Meguiar’s 105, two passes to remove the sanding marks.
2. I believe we used 3M Ultrafine Machine Polish for the final refining.
Please take into account that this combination worked on this car, but might not work on any other. This was an aftermarket clear-coat, and all paint finishes can be different from others. What works on one certainly might not work on another.
I hope this helps and gives you a better idea of what goes into some of these large projects. Thanks for taking a look and happy detailing!
How long do I have to wait to buffer clear coat ? Can someone help me?
For fresh clear coat, see the product manufacturer’s recommendation. Under normal circumstances, a 2k clear coat is buffed after 24 hours and usually before 48 hours when the finish is still very slightly soft
Thank you Marc
One more question, I just got my 2010 Red Audi back from the Audi Body shop after 4 weeks of repair after a driver hit my car. They followed the factory specifications and original Audi paint ,it looks very good. The body shop suggested not to wax or apply a sealant (blackfire) on the new pain for a month. They have ovens were they dried the paint but they said that it has to “cure” does this sound correct?
Hope you can help
Regards,
Art
Art,
The body shop left you with great advice. I know it’s hard to sit and wait while your car is not protected with some kind of wax or sealant, but you really do need to wait for the paint to fully cure. Body shops don’t have the same multi-million dollar paint booths that factories do (nor the luxury of painting without rubber seals, hoses, plastic trim, the ECU, etc installed), so they can’t “bake” cars in the same way. A car that leaves a factory is completely cured. A car that leaves a body shop is 90-95% cured and will need somewhere between 30-45 days (even up to 90 days depending on their process, the paint they used, and their recommendation) for the final amount of solvents to escape from the clear-coat.
Once you’ve waited, you can prep and seal any of these panels. They’ll likely need a thorough wash, clay, light polish, and finally your favorite protection.
The most important thing is that you’re alive and well after the accident. While you’re Audi is certainly a nice car, it’s nothing without a great enthusiast to take care of her 😉
Happy detailing!
Thank you Mark!!!
I guess you are correct and makes since now.
I did get a bird dropping yesterday in the middle of the hood. I wonder if they are trained to screw up car paint. Can I spot polish it or wait until cure?
Art
I think birds really do target the guys that care the most. Makes me ponder getting a pet eagle 😀
Clean and think about polishing the section, but keep in mind once it is cleaned off, any damage that is there could just be polished once it is cured so that you can wax it directly after. Personally, I’d wait until the 30 days are up and then go to town.
Sounds like a plan.
Marc Meguiar’s Scratch X 2.0 might be a good option for this small spot in the middle of the hood?
Art
Art,
It may, or may not do that job. 🙂
I know we all want definite answers, but if you’ve learned anything from the Ask-A-Pro section here, you should take away the trial and error process and least-aggressive-method approach.
If you have any more questions, my phone number is on our website, please feel free to give me a call. I have no problem talking with a fellow car enthusiast and helping them to expand their knowledge while improving their vehicle’s appearance.
Marc, I have been waiting for this second part for a while! excellent write-up and thanks for your insight. I definitely have a much better understanding of what orange peel is and the process needed to correct it (even though i dont think i would ever try it). Thanks!
Mo,
Sorry for the delay, but I’m glad you found this information beneficial. Wet-sanding shouldn’t be taken lightly, and orange peel removal isn’t something I’d recommend to most people. A huge difference is made with proper polishing and does so much to refresh a car, that most people are floored at their new found gloss.
Thanks for taking a look!
Hey Marc, I wanted to know if you recommend me using the mirka bulldog 5.5 inch DA, 3M DA or the Griots Garage DA. Which sanding disks do you recommend also, Albrolon mirka sanding disks or #m sanding disks.
Alberto,
Thanks for the good questions. The 3 DA’s you’ve referenced are all very capable of effectively sanding a vehicle’s finish. The main drawbacks with the Mirka and 3M unit are they’re powered by air compressors, so you’ll be limited to where you can use these tools. Because of their ability to quickly connect and disconnect to air powered systems, they’re extremely popular with body shops that already have industrial sized air compressors to handle the demands of HVLP spray guns and other tools.
An electric powered DA, such as the Griot’s unit you’ve mentioned, allows for portability, which is a key for a detailer. Aside from being able to move the electric DA around to various locations, they also have interchangeable backing plates that allow you to use different sized sanding disks or polishing pads – another big positive.
As for sanding disks, 3M, Abralon, and other brands have all been proven effective, and have their followings. You likely won’t need anything more aggressive than 1500 or 2000 grit paper, Though I’d recommend using 3000 and taking your time if you do want to sand an automotive finish. You can even look into 4000 grit disks as well as using such fine paper makes it much easier to polish out DA sanding marks.
I hope this helps to point you in the right direction, and let me know if you have any other questions!
Marc
Marc, I do have access here at my shop to an air compressor, a 15 gallon one. I know they also have swivel air quick disconnect adapters for better mobility. I would prefer to use a air powered DA. What are the other drawbacks of these besides mobility issues. If you were to pick one of these air powered DA’s, what would you choose. I’m leaning more towards the mirka bulldog. If I did go electric, what electric small sized DA would you go with.
Well if you already have a set-up to handle the air-powered DA, there’s certainly nothing wrong with getting one. It’ll certainly last you a long time. Aside from mobility issues, they’re very well built and should be rock solid. Because I don’t have an air powered DA, and only have limited use on one, I gave a call to a buddy of mine that has much more experience with these types of machines. Barry Theal of Presidential Details has this to add:
“If you’re looking into air powered DA’s, check out either a Dynabreed, 3M, or Snap-On as far as brands go. Make sure it has a 3/16th inch orbit in order to give you a finer finish. Some DA’s are better built for defect removal while others excel at their finishing ability. A 3/16th inch throw will give you the best finish overall. This will be even better than an electric DA’s finishing power, though they are still capable of getting the job done.
A quarter inch interface pad will be needed for an air-powered unit to effectively contour to curved body panels, and I have found it perfect for finishing down in sanding. If you’re going to invest in a air powered DA system, I would highly recommend you also make this purchase.”
So big thanks to Barry for lending me some of his expertise 😉
I hope this helps to shed a little more light on what set-up you want to consider. While air-powered DA’s are limited in mobility and won’t be used to polish the sanded area, electric DA’s don’t have the same amount of options to give you the most customized work. Think of air-powered DA’s as being very good but limited in use, while electric DA’s as being the jack of all trades; masters of none.
Happy detailing!
Thank you for getting that info for me Marc. Will definately be looking to remove the orange peel out of my 2006 Phantom Black Metallic GTO.
Marc this is a great article! Glad to offer my advice to you. Thaks again.
Thanks again Barry for lending your experience to the readers of the DI blog as well as myself. I’ll be in touch soon 🙂
What paint thickness gauge is that? I want to get me one like it.
Thanks.
Jon that is NOT a paint thickness gauge, it’s a infrared thermometer to see how hot something is.
why is it that polishing will never remove orange peel? even with an aggressive pad and compound?
I had my truck painted at MAACO in Ft. Myers Fl. They had to paint it 2 times because of poor prep work. I still have orange peel on it and over spray on my windows and chrome rims. What can I do to to clean the glass and rims? What about the orange peel? I spent over 2,500 on this.
Hey Marc,
I have a 93 ford mustang and I had it painted about 6 months ago. I wanted to know about hard to remove wet sand marks left behind by 800 grit wet sand paper (ugh). I have gone over this about 4-5 times with 2000 and Im still able to see them when the sun hits the car just right.That’s after I use compound and polish as well.
What if anything can I do so that I lift the sand marks out. Any help would be great!!
How do you do edges or tight areas or hard to reach places without taking the risk of going through. Thanks
how to wet sand tight places and buff without going through
When I originally commented I clicked the “Notify me when new comments are added” checkbox and now each time
a commet is added I get seeveral emails with the same comment.
Is there any way you can remove people from that service?
Cheers!