Ask-A-Pro: How to Clean and Maintain Detailing Equipment and Tools
by Todd CooperiderI’ve comprehensively read your guides about the car, but my question is, how do I wash my working materials such as the mitt, microfiber clothes, “great white” cloth, and buckets?
Thanks,
Neil
Thanks for submitting your question Neil!
It’s actually a great topic because unfortunately, many people don’t take the necessary steps to properly maintain their equipment and tools. If we want our tools to take care of our cars, then we must take care of the tools as well.
Fortunately we already have some articles that address the topics, so I’ll combine information below along with links to existing articles.
Microfiber Towel Maintenance:
High quality microfiber can become a large investment, and you’ll always find that you don’t have enough! So with as much as you invest in it, you should take the necessary steps to ensure it remains effective for as long as possible. Since we have several comprehensive articles on the subject of microfiber maintenance and storage (links below), I’ll just provide the Cliffs Notes version:
- Wash and dry your microfiber by itself…don’t mix it in with the rest of the laundry.
- Hot wash / cold rinse followed by lowest heat setting in the dryer.
- Don’t use fabric softener or dryer sheets when cleaning microfiber.
- Preferably use a dedicated cleaning agent such as Chemical Guys or Micro-Restore
- Don’t allow your towels to touch the ground. Keep a separate laundry basket in your garage.
- Wash your general purpose towels (heavily soiled…door jambs & such) separately from your fine finishing towels.
- Safely store them where they’re not exposed to any potential dirt, dust, or debris.
Helpful articles:
Microfiber Storage and Organization
Sheepskin Wash Mitt Maintenance
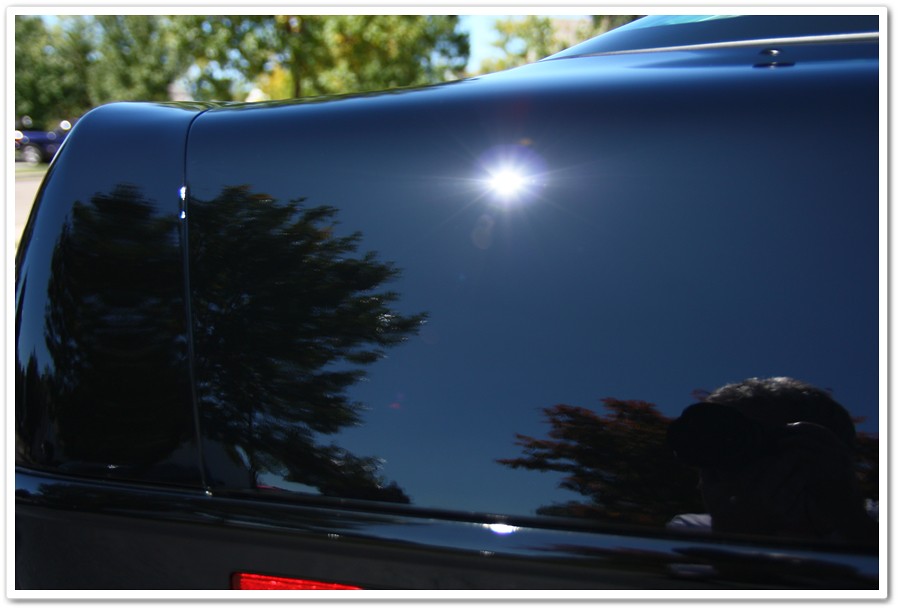
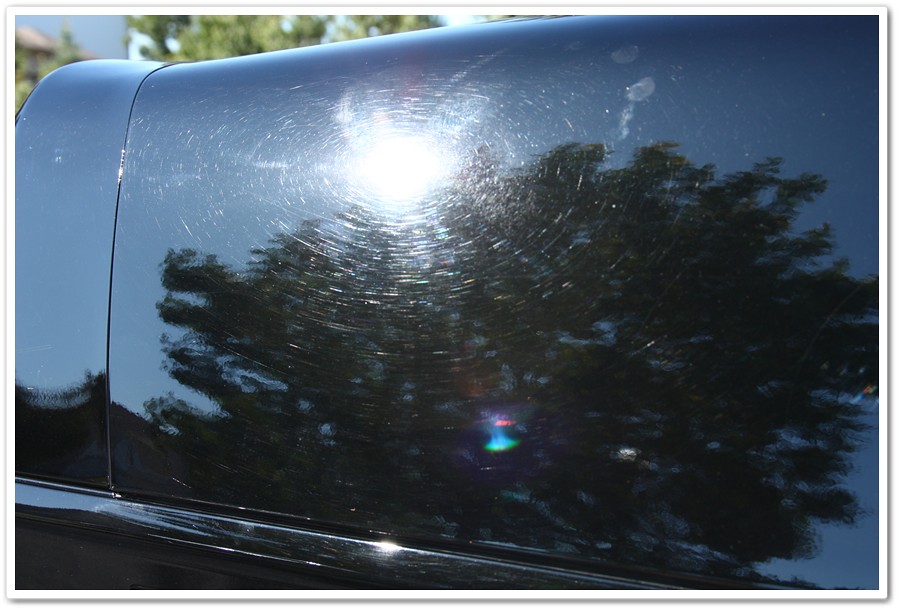
If you want to maintain a swirl free finish (or prevent causing swirls), it’s absolutely imperative that you keep your wash mitt clean and in like-new condition. Improper wash techniques, or a poor condition wash mitt can quickly turn your finish from this:

To this:

Now that I have your attention courtesy of the black Corvette photos, let’s take a closer look at what we need to do to keep our wash mitts in top shape.
The first step is actually to make sure that you’re keeping them clean while you’re doing the washing. By using the Grit Guard 2×4 Wash Method, you’re going to significantly reduce the amount of dirt and debris that gets into the mitt. When you’re done washing the car, you need to fully clean it out, allow it to dry, and safely store it. Unfortunately, many people simply throw it in the bucket (without washing it out) until next time. This method allows for debris build up, mold and mildew growth, and the wet mitt will also catch everything settling in the air out in the garage (grass, dust, dirt, bugs, etc).
- NEVER allow the wash mitt to touch the ground!
- Immediately after using it, gently wash the mitt out by hand in the sink. I like to allow it to soak for a while in water and gently agitate it to allow the debris to dislodge from inside the fibers of the mitt. Even after rinsing it out with the hose after washing the car, you’ll be amazed at how much dirt and debris settles at the bottom of the sink when you wash it this way.
- Do a final rinse, wring out the excess, and allow it to hang dry. I have hangers with clips, and let them hang dry in my laundry room.
- Once dry, safely store them where they won’t be exposed to dirt, dust, debris (don’t throw them back in a bucket, or lay them on a work bench!)
Helpful article:
How to Properly Clean and Maintain a Wash Mitt
Wash Bucket Maintenance
You should have 3 buckets in your arsenal (wash bucket, mitt-rinse bucket, and wheel bucket), and chances are pretty good that none of them get cleaned regularly. Go out and take a look at your rinse and wheel buckets in particular…they probably look pretty nasty inside and have a dirty residue inside of them. And when you stack them, the dirt and debris from the bottom of one gets on the inside of another.
There’s nothing real special or particular when it comes to maintaining your buckets…just give them a thorough cleaning inside and out on occasion or as necessary to prevent any buildup of grime or debris that could get into your wash media. Just use a general purpose brush or sponge and just about any kind of cleaner or soap to clean them out.
You also want to thoroughly rinse them out both before and after using them to wash your cars. While sitting in the garage between washes, your buckets may have collected debris so be sure they get a good rinse before filling them up.
Other Items:
You probably have a lot of other tools that you use or come in contact with while detailing, and you want to make sure that they are kept clean as well. If you’re touching dirty tools, then touching the finish of the car, you risk damaging the paint or soiling a clean interior!
- Occasionally clean your power and extension cords. These drag across the floor and quickly become quite filthy. They’ll get your clothes dirty, and they’ll get crud and abrasive debris all over your hands.
- If you have a handheld inspection light like a Brinkmann, make sure the handle gets maintained. They’re typically sitting on the floor when not in use, and it’s just another item that can transfer dirt.
- Make sure that all of your wheel brushes are thoroughly cleaned out after each use. A little spray of all purpose cleaner and a rinse with the hose should suffice. Try to get as much water off of the brushes before storing them back in your wheel bucket.
- Wipe down your polish bottles from time to time.
- If you have storage bins or drawers (especially where you store your towels or polishing pads), check them occasionally to make sure they are clean and free from debris at the bottom. All it takes is a little bit of dirt in there to cause major problems with paint!
So there you have it. It’s mostly common sense, but there are a lot of items that we may forget about as we’re busy working on vehicles. Keeping all of our detailing equipment and tools clean not only helps to extend the life of them, but it will also prevent the transfer of dirt and grime to the finish that we’re working so hard to perfect!
If you have any additional comments or questions, please post them below in the comment box.


Love all your articles Todd, what do you use to clean your polishing pads?
Thanks Adam.
If I get to clean them immediately after using them, I’ll just throw them in the sink filled with water and a little bit of Chemical Guys Citrus Wash. If they had a chance to sit and dry up, then I’ll just spray them with some APC first, and then soak them in water / Citrus Wash.
What is the best way to dry polishing pads after they’ve been washed?
Is there a recommended procedure that is faster than simply air drying them that is safe?
Thanks.
Glenn,
If you have a rotary polisher, you can attach the pad and spin them at high speeds to get rid of most of the water and then air dry from there. You can also put them in the washer on spin cycle only to help get rid of the majority of water, and when I’m in a hurry I’ll throw them in the dryer by themselves for a short cycle on the lowest temperature setting…never had any problems with this method.