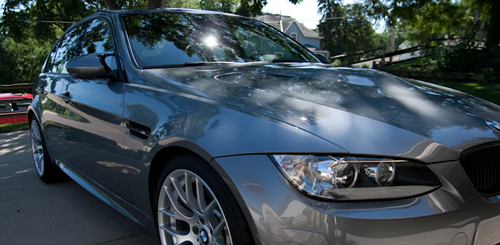
A good client of mine had contacted me in the spring asking questions about a new M3 he had just ordered. Over the years I’ve taken care of several new vehicles for this owner and having pointed out damage caused by new car dealers, he was very concerned about getting his new baby in unmolested. I had instructed him to strictly inform the dealer not to touch the car outside of the necessary PDI (pre-delivery inspection) work…apparently he reminded them of this several times during the waiting period. He also informed the sales guy that I’d be coming along the day of delivery to inspect the car, and that if it had been washed, detailed, or damaged in any way, he wouldn’t accept the car. LOL, you should have seen the sales guys face when I pulled out my Dual Xenon Brinkmann and started looking over every square inch of the car! 🙂
I didn’t have my good camera with that day but I did snap a few phone pics…I was actually impressed that the dealership listened to his request!
The arrival date on the car had changed a few times so it was a couple weeks before I could actually get to it as a results of scheduling conflicts. This meant the owner would be doing the first wash himself. He was a little nervous about this at first, but he had read Todd’s washing/drying article before and I had also shown him how to wash a time or two when working on his other vehicles. He was also fully equipped with a CR Spotless system, pressure washer, Sheepskin Wash mitt, and high quality DI drying towels, so I assured him he could handle the job. 😉
The car arrived at my place a couple weeks later, minus a few bugs on the front and some adhesive from the protective wrap, it was clean and unmolested.
Appearance mod installation
First up would be the removal of the factory chrome grills and installation of the gloss black ones.
Much better!
Next I would be removing the front reflectors and replacing them with painted inserts.
Color seemed off a hair but it did offer a cleaner look
I then moved onto removing the chrome turn signals from the fenders and replaced them with blacked out ones.
Last but not least, remove the chrome badges in exchange for black ones.
New Car Prep
Moving onto the detailing portion of the job, I started out with a good foam bath using Chemical Guys Citrus Wash followed by a 2BM wash using a Sheepskin Wash Mitt.
Wheels needed a good cleaning with Sonax Full Effect and various brushes. They would later be removed and prepped for the Opti-Coat application.
Tar specs removed from barrels
Ready for Opti-Coat 2.0 application
Opti-Coat 2.0 Application
Better than new!
Wheels re-installed and torques to factory specs
After claying the car with some fine grade clay I did a light polishing with Meguiar’s M205 on the DA polisher equipped with a crimson LC pad. Then I rewashed the car and wiped it down with a 15% IPA solution. You can also see a quick video of my Opti-Coat 2.0 application below and the full review for the product can be found here.
http://youtu.be/5itLTTTMexE?hd=1
Now for some finished pics!
Buy Products From This Article
Purchase the products used in this article individually or in one convenient package here!
