2008 Cadillac STS-V, Major Paint Correction
by Chad RaskovichThe owner of this 469-hp beauty contacted me late last fall after purchasing this car used. Since he was going to be storing it for the winter we decided to wait until this spring to perform the paint correction.
Upon inspection heavy swirls and dealer installed holograms were apparent on all panels. The owner and I agreed on a 2-step correction which should have removed the holograms and most the swirls. However, lately I have come across too many vehicles which appear to only need a 2-step correction, and I ended up getting burned by those nasty SHRIDS. Because of this I wanted to make the owner aware of the possibility that they may appear once I started the correction. For those of you who may not know what SHRIDS are, it’s basically my twist on the RIDS, or Random Isolated Deep Scratches. SHRIDS are the same as RIDS except they cannot be seen when the finish is so cover in swirls. Because of this I’ve coined them Sneaky Hidden Random Isolated Deep Scratches….SHRIDS!
On top of all the swirls and holograms The owner had a few areas of concern which required a little wet sanding. I wasn’t able to fully remove them, but I improved them to the point where they could hardly be seen.
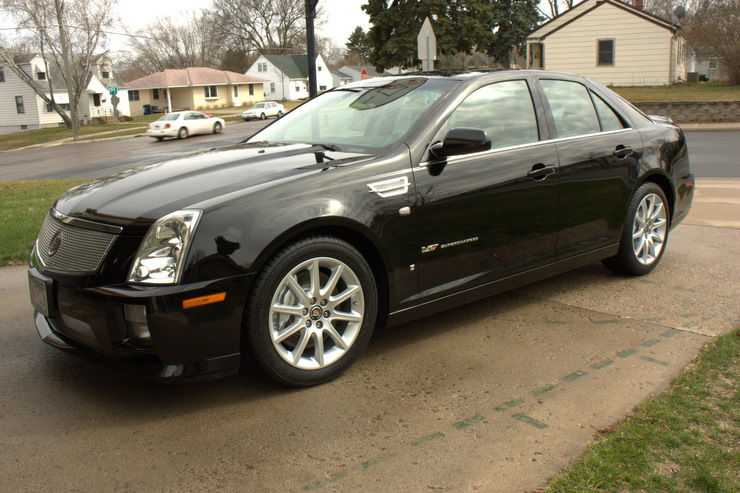
Now lets see some pics! Here is the car as it arrived.

Here is one outside after a thorough wash using CG Citrus Wash and Clear with the help of some P21S TAW to remove any wax or fillers the dealer may have applied. I then pulled the car back inside and proceeded to clay it with Detailed Image fine grade clay using Meguiars Final Inspection as a clay lube.
Looks great under the overcast sky doesn’t it???
Still look great???
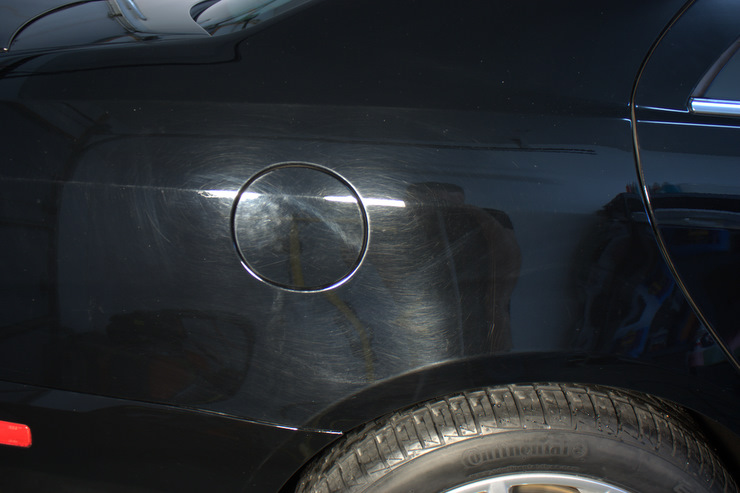

Buffer holograms can really be seen here
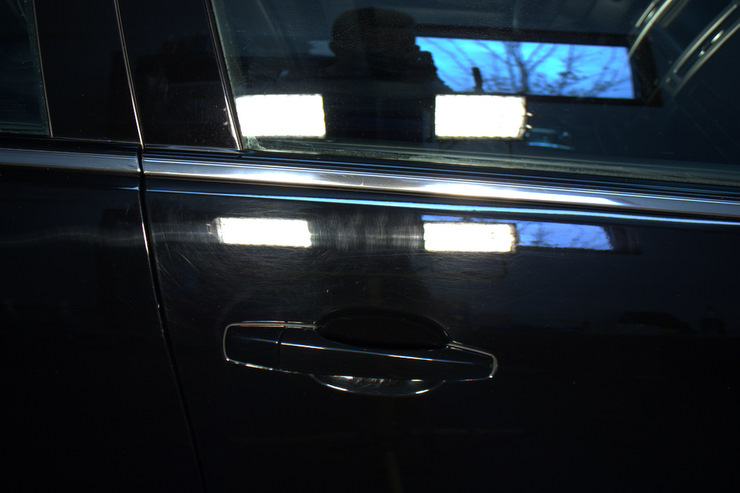

Every panel was loaded with swirls and holograms!
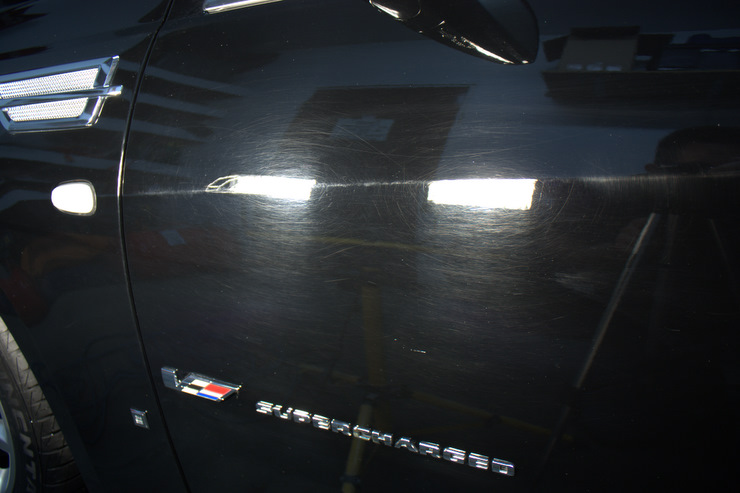
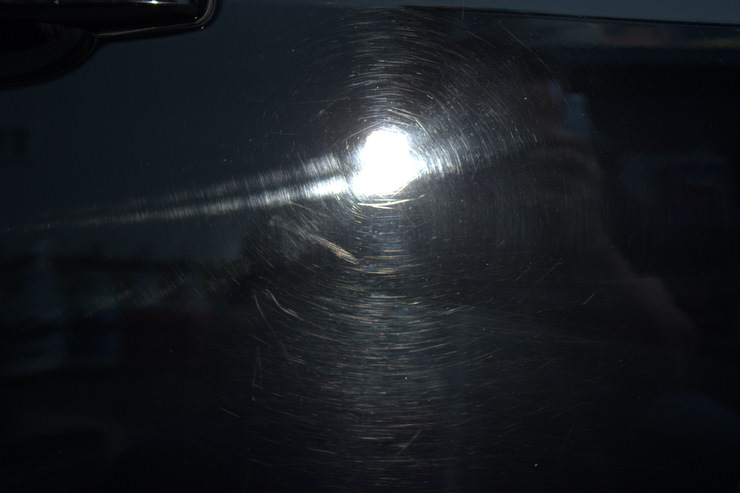
The passenger side fender was one of the areas of concern the owner had. It appeared someone had been leaning up against the car and had either a belt on or some other hard object that kept rubbing against the paint.
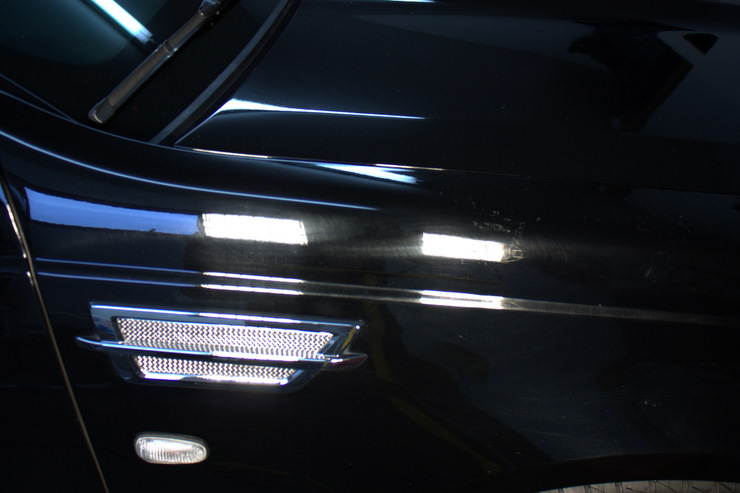
Zoomed in a little closer you can get a better idea of the damage. Most of these scratches were actually on the sharp bend of the fender which is never an easy area to correct as it’s very easy to rub through. This area was carefully wet sanded while using a PTG to carefully monitor how much paint I removed, ensuring that I didn’t remove too much clear coat.
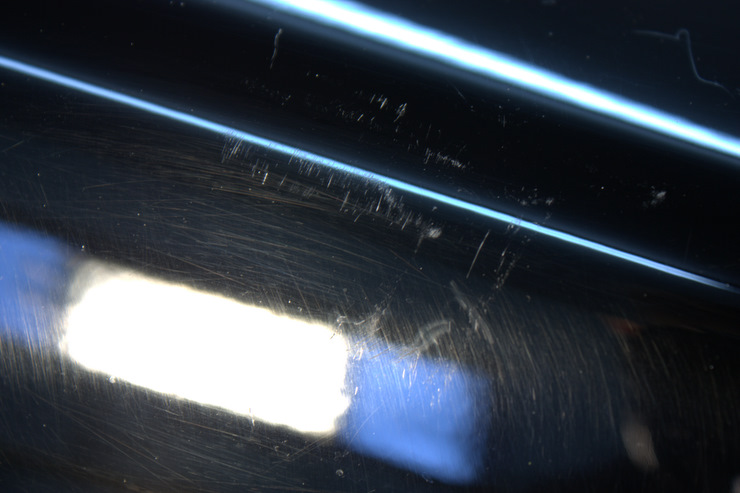
Anytime you attempt to polish a car you should always do a test spot first to make sure your process is going to have the desired effect you are after. Since I already had a plan of attack I started my test spot out by using Meguiars M105 on the Porter Cable 7424XP using an orange LC 5.5″ pad. After doing two buffing cycles it was apparent that a 2-step correction was not going to be enough….those nasty SHRIDS have struck again!
Here is my test panel taped up. You can see both side still have heavy swirls.
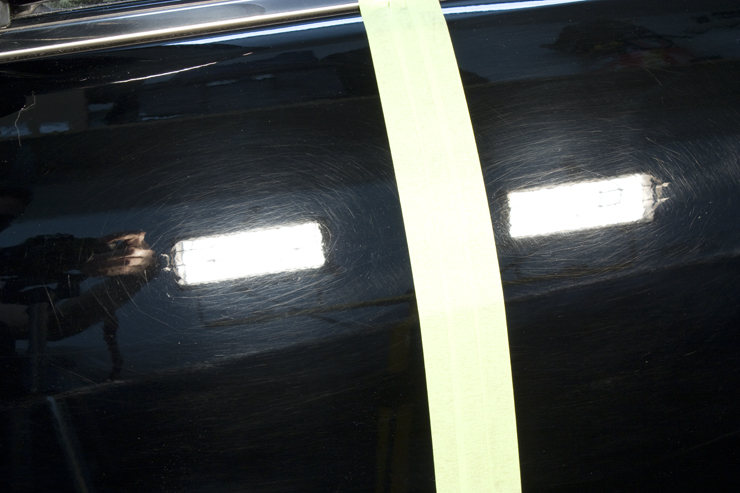
After two buffing cycles using M105 all the swirls were now gone, but the SHRIDS are now clear as day! Because there were so many of them I simply could not let a car go out of my shop looking this way and my 2-step correction just turned into a 4-step correction.
Here is a 50/50 shot after the M105. As you can see there was a huge improvement in the finish but the SHIRDS are very noticeable.

Zoomed in closer on the corrected side you can better see them
Here is that same section after using M105 on a rotary polsiher equipped with a heavy cut wool pad and then followed with M105 on the Porter Cable 7424XP with an orange LC pad. Some faint micro marring can be seen which was removed in the proceeding buffing steps.
Here I wanted to show a good way to safely polish the lower edge of the deck lid. If I were to polish this area with the deck lid closed you could possible damage the bumper cover if you are not careful…If the side of the buffing pad or backing plate were to touch the bumper cover it could easily damage the finish! This method puts a large distance between the two perpendicular surfaces and also allows you better access for polishing.
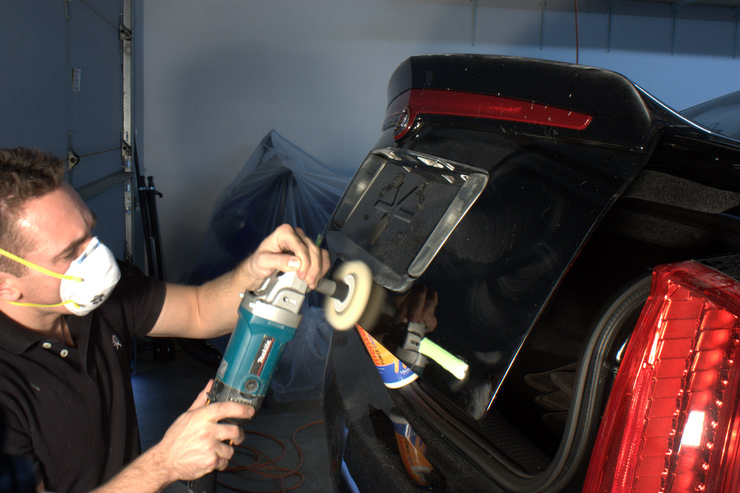
The final correction process I decided upon after doing my test spots was as follows:
- Meguiars M105 on the rotary equipped with a heavy wool cutting pad. Polisher was run between 1200-1500rpms.
- Meguiars M105 on the Porter Cable 7424XP equipped with 5.5″ LC Hydro cyan pads on a speed of 6.
- M205 on the Porter Cable 7424XP equipped with 5.5″ LC white pads on a speed of 6.
- 3M Ultrafina on the rotary equipped with a 6.5″ LC blue pads. Polishing was done by spreading out the polish at 900rpms, polishing for several passes at 1800rpms followed by another pass or two at 900rpms.
Paint protection was done using Blackfire Wet-Diamond, glass was cleaned with Meguiars D120 glass cleaner and then polished using KAIO, tires dressed with Meguiars Hyper Dressing at 4:1, stainless exhaust tips were cleaned/polished using M105 and #0000 steel wool, headlamps/tail lights were polished using M105 and and orange LC pad followed by M205 with a white LC pad using the Porter Cable 7424XP.
Anyone ready to see some finished pics?
Sorry, no sun pics were possible

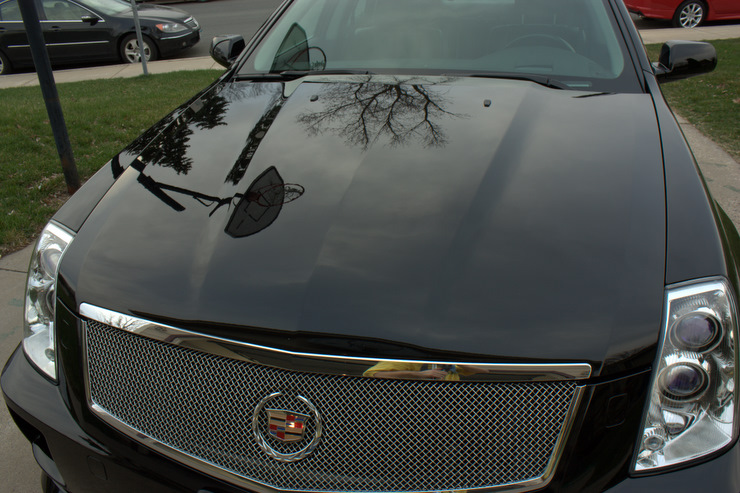


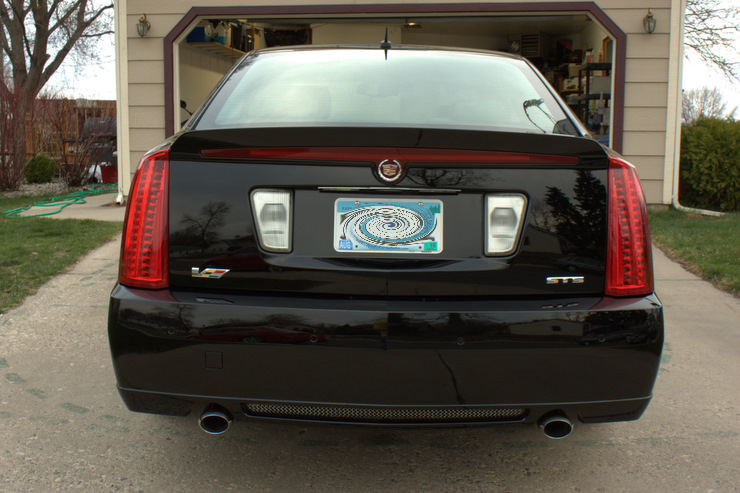

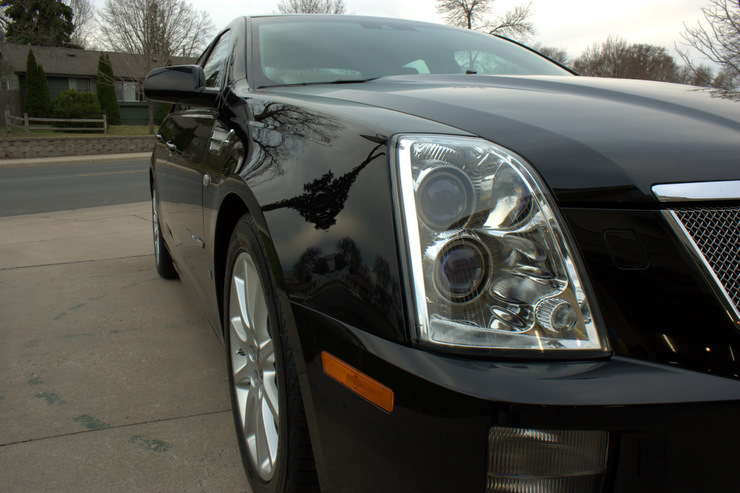
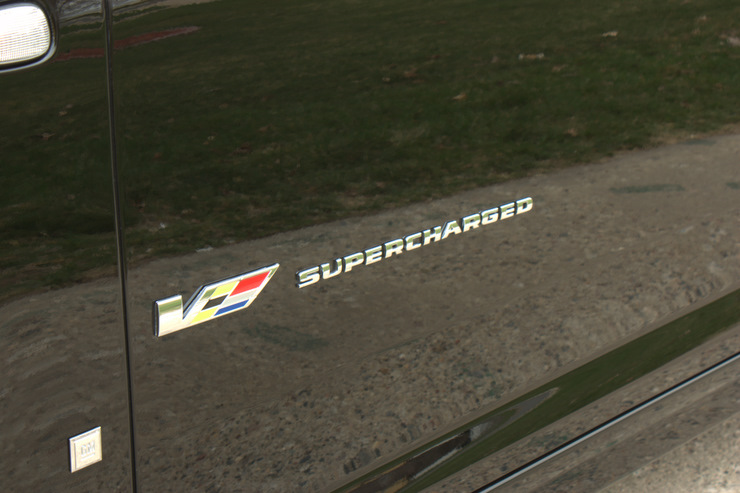
Some cool reflection shots

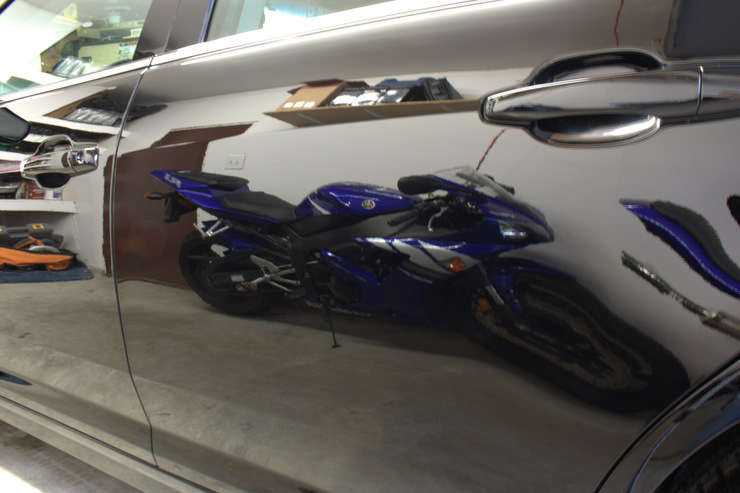
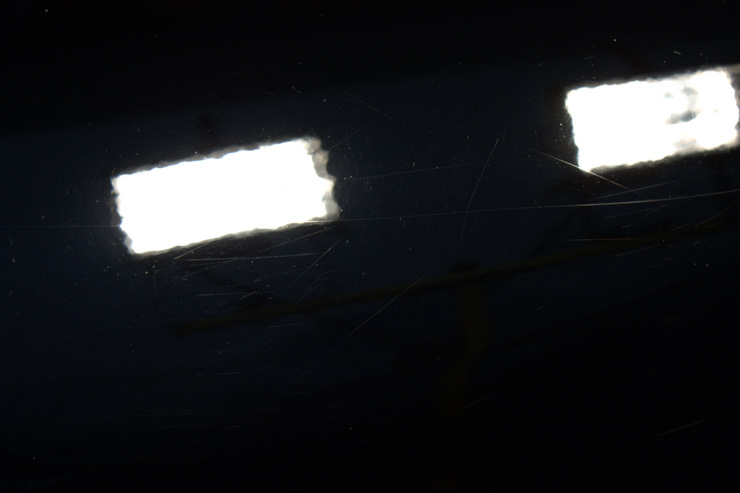
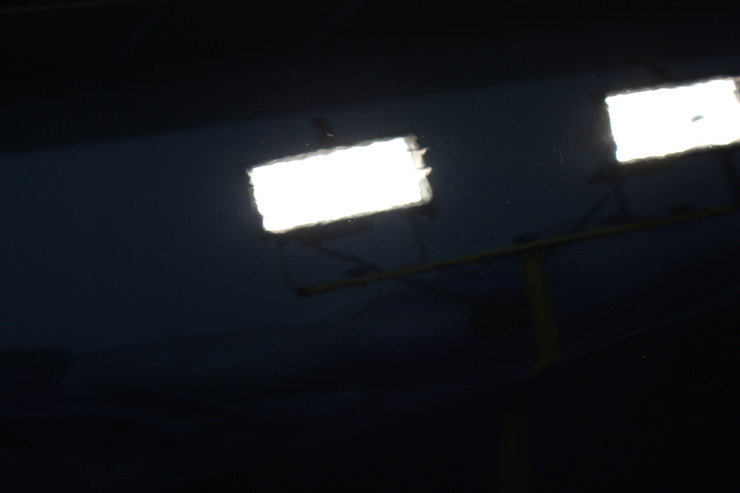
Halogen shots
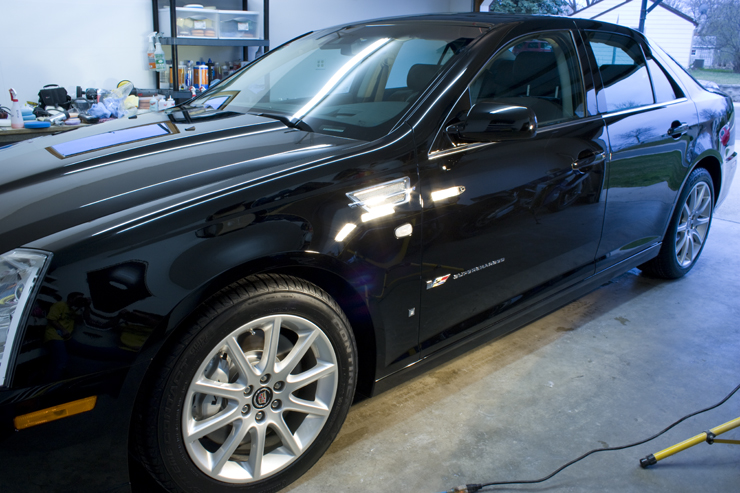

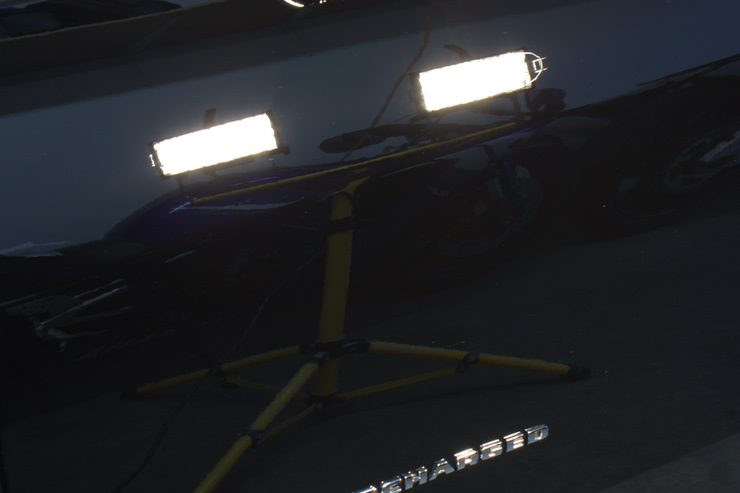
Fender shot that had the deep scratches
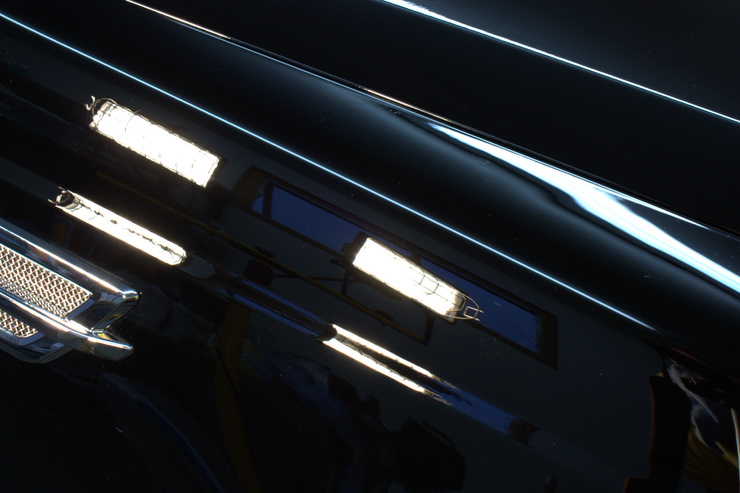
Fender Zoomed in

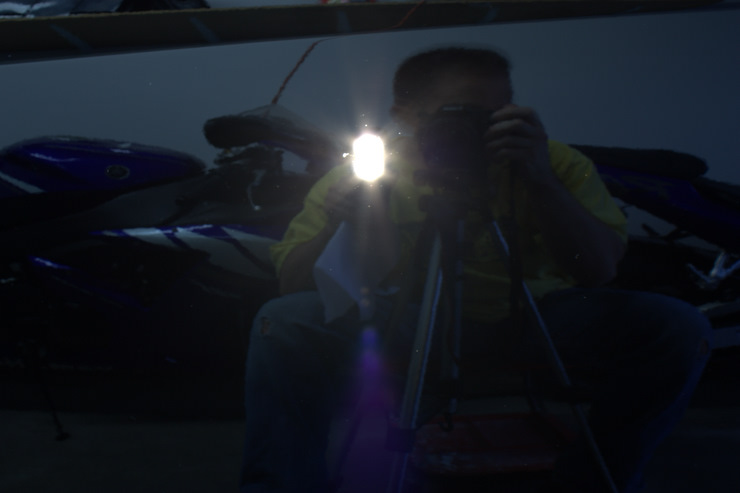
As always, thank you for taking the time to view my work. If you have any question or comments please feel free to submit them in the comment box below.


Hi,
I don’t have a buffer yet and am going to buy one, I see you you used two different buffers for this job a rotary and the Porter Cable. Could this job be done with just a random orbital buffer like the Porter Cable you used or the Flex?
Thanks,
Raj
Hello Raj,
I’m confident the job could have been completed using just the Porter Cable 7424 or the Flex 3401. However, on this particular car the best tool for accomplishing the first step in a “timely” manner was a rotary buffer. As you can see in the 50/50 picture above the Porter Cable 7424 greatly improved the finish with little effort, but it was those deeper scratches that it had a hard time removing. Since the Flex 3401 has a forced rotation, it probably would have been the next best tool for removing those deeper scratches. I also could have switched to 4″ pads on the Porter Cable which would have also allowed me to better handle those deeper scratches. All paints are different and some simply don’t react well with certain polishes, pads and tools. The key is finding what pad, product, and tool works best for the particular paint your working on…which is why we ALWAYS do a test spot first.
When it comes to serious correction the rotary is still king in my book, though I do prefer the use of the Porter Cable for its ease of use and not having to worry about holograms.
If you’re in the market for a polisher any one of the 3 polisher types are capable of doing the job, but each does have their own set of pros and cons. If you’d like help deciding on which polisher you should buy, one of us Pros will gladly help you out…Though It would be best to submit the question in the Ask-A-Pro section to keep this article on topic. Simply tell us what you plan to use the tool for (personal cars, detailing hobby, or full time business). If it’s just for personal use, any info on your vehicle such as year, make, model and condition will also help us suggest the best tool and products for you.
Hope this helps,
Rasky
Hi Chad,
Thanks for your reply. I have another question, you mentioned that when you washed the car you used CG Citrus Wash and Clear with the help of some P21S TAW to remove any wax or fillers, I am new to this and this may seem like a silly question but did you mix the P21S in with CG Citrus Wash and Clear or did you use them seperately in two different steps?
Thanks again for all the great information.
Raj
Hey Raj,
I actually carry a separate spray bottle with me as I go around the car and I will spray a few panels at a time with the TAW. I then let it dwell for a short period of time and then wash it off with my mitt and soap solution. Some caution should be used when doing this and you should avoid doing it in the hot sun or leaving it to dwell for extended periods of time. This is done to remove any waxes, sealants, or glazes on that paint that could potentially interfere with the correction process and it also allows us to see the true paint condition. There is actually an article I created that brushes on this subject which you may want to check out.
https://www.detailedimage.com/Ask-a-Pro/what%E2%80%99s-the-best-way-to-remove-old-waxsealant-so-that-i-can-apply-a-newdifferent-one/
Rasky
Hi Rasky,
As you suggested I sent out a question regarding buffers but did not get any response so I just wanted to ask you what I think is a quick question. I was thinking about buying the Flex but then realized that the combination you used the PC and a Makita Rotary together cost just a little more than the Flex. So my question is would you recommend buying the Flex or the both the PC and Makita? My 2008 Ford Explorer has alot of SHRIDS buy my 2009 Civic SI has mostly swirls. Also did you use the rotary over the entire car first and then follow up with PC or use the PC first and then use the rotary just on the SHRIDS? You also mentioned you polished the glass with KAIO, did you use a buffer for that or by hand(I am assuming by hand but thought I would ask)?
Thanks alot for your advice and help.
-Raj
Hey Raj,
I have not seen your submitted question yet…it is possible that it was assigned to another team member though.
This is actually a common question that I get asked a lot of various car forums. The purchase of both the Makita rotary and Porter cable 7424XP offers far more flexibility than just the Flex unit alone. However, caution MUST be used with the rotary and I strongly suggest learning how to use it on a junk car or scrap hood before attempting to use it on your own vehicle. The reason most users buy the Flex is that they want correction close to that of a rotary, as well as some of the safety found in the PC. I also find that some paints simply don’t finish down as well with DA as they do with a rotary…this Caddy being one of them. The opposite is also be true for some paints as well and you may find the DA to be the better tool. Basically by having both tools you better equip yourself to handle any type of paint that may come your way.
On the Cadillac above the SHRIDS were so profuse that I had to go over the entire car with the rotary first. I then followed with the PC to remove the deep holograms left behind by the rotary. However, If you only have a few random scratches then it makes more sense to just spot hit them with the rotary.
On the glass I actually used the PC with a white LC pad to polish. Keep in mind severe water spotting may require more aggressive measures than what I used.
Hope this helps,
Rasky
Rasky, thanks for your quick reply. I think I am going to get the PC first and then if I find I still nee more correction I will add the Makita. Just a couple of more questions. What size pads would you suggest I start with? Can you point me to any articles or videos on how to use a rotary polisher? And just out of curiousity how close are the results of the Flex to a rotary?
Thanks again.
-Raj
Great work Chad! I bet the owner was ecstatic.
Thanks Ivan!
The owner was very happy indeed!
Very nice job. Any pics of the M105 results on the exhaust tips?
You mentioned that the PC with 4″ pads may have been able to get at those deeper scratches. Do other products work as well with the M105 as the M205 or do they really have to be used together?
Thanks Kris!
Sorry, I didn’t take any close up before and after pics of the exhaust as they were not in that bad of shape and wouldn’t have had the dramatic transformation like you saw with the paint.
M105 and M205 do not have to be used together and there have been many times where I may start with one of them and then finish with Menzerna or some other product. They really do work well together though…especially when using a DA polisher like the Porter Cable 7424XP.
Rasky
Simply a work of art. very very nice job. thanks for the detailed write-up.
Thanks Mo! I really appreciate the feedback!
Rasky
Raj,
I think starting out with the PC is a good idea! I personally like using the 6.5″ pads and the 4″ pads for tight areas, but the 5.5″ pads fit nicely in between them and if you’re only going to get once size I’d say go with those.
I think the Flex is very capable of getting the same results as a rotary but many variable can come it to play which may require tweaking of your technique and likely a little more over all time to get the same results.
Rasky
OK so i have a Black and Decker rotary buffer and im using a wool pad to remove some medium swirls and it leaves behind some holograms after im done. I just wanted to snow what would be the best pad/polish combination to get a perfect finish. Right now im using Meguirs SwirlX and a orange ligh cut polishing pad and a white foam final polishing pad.
Hello Mike,
First lets keep in mind that all paints are different and what may work on one car may not be ideal for another.
Wool pads are great for heavy defect removal but may be a little over kill for light to moderate defect removal, and they tend to leave some significant marring of their own, especially when used with an aggressive compound. Anytime I use a wool cutting pad I will almost always follow it up with M105 and a orange LC pad, or a Cyan Hydro Tech LC pad. This step will remove all the deep marring left behind from the wool pad and while it may look pretty good, it will still require further refinement to remove all the holograms. To finish it off you will then want to follow that up with M205 and a black LC pad or a Tangerine Hydro LC pad. Some paints may benefit from an additional step with a blue LC and and Menzerna PO85RD, but again it will depend on the paint.
If you let me know what make/model/year of vehicle you are working on, what wool pad you used, and with what polish, I can narrow it down to a specific process. Otherwise the above would be a general process for most cars.
Also, depending on your level of experience with a rotary buffer you may want to consider finishing with a DA style polisher instead, as this will eliminate any chance for holograms. Producing a holorgam free finish with a rotary buffer usually requires a fair amount of experience.
Rasky
Rasky,
This was an amazing job!!! I was doing some searches related to RID removal and this one seemed exactly what I need. I just picked up a 2001 BMW 740i in Jet Black. The paint surface looks similar to the caddy but I wouldn’t say it’s as bad (close though :)). I’ve read that Jet Black is a softer paint. I’m not sure which products/pad combos work best with this type of paint. So if you had the same type of finish as the caddy what would you suggest? I typically use the Menzerna polishes but have purchased both the M105/M205 based on a lot of reviews here. I’m using the PC and have LC pads for it. Any tips would be awesome!
Thanks!
Thanks Pete!
It’s actually been some time since I’ve had the “pleasure” of working on a Jet Black BMW…actually it was even before M105/M25 were released. Regardless, you need to keep in mind that paints will vary from year to year and it’s always best just to do a few test spots. I’ve seen two models of cars in the same color respond totally different when using the same process. Some like being polished with a DA and some simply do not respond well to a DA and only a rotary will work on them.
From my experience working of soft delicate paints, Menzerna usually teds to finish out a little better for my polishing style, but M105 and M205 do work excellent for the preceding steps. If your paint is similar to that of this Caddy, I’d probably suggest the following combo as a good starting point, keeping in mind that your test spot will tell you if this combo is going to work or not.
-M105 using either a tangerine, orange or cyan LC pad.
-M205 using either a black, white or tangerine LC pad.
-PO85RD using either a blue or crimson LC pad.
I’d probably go the Hydro LC pad route if you have them as I have been using them more and more lately with excellent results.
You can also check out this article by Aaron Baumann for some helpful info on Jet Black.
https://www.detailedimage.com/Ask-a-Pro/ask-a-pro-how-to-polish-bmw-jet-black-paint-effectively/
Hope this helps,
Rasky
I am getting ready to clay and detail my toyota supra this spring. im looking forward to claying for the first time! i have a freind whose camaro is always meticulously clean, everyone gawks and stares at it. he swears by using dawn dish washer soap for his pre clay/wax and detail. is using dawn a safe wash/precleaner for a detail? just sounds a little risky to me is all…….whats your opinion?
Hello Nick,
You bring up a great question, one that actually see’s a LOT of debate in the detailing community. In fact, the answer you receive will depend on who you talk to, and even among the Ask-A-Pro blog authors we may not see eye to eye on this subject.
As a rule of thumb I always try to use products that are designed for use on automotive materials. Anytime you use a product on a surface it was not intended for, you risk the possibility of damaging that surface. Since I’m not a chemist I can’t say for certain what a product like Dawn will do over time to a cars exterior materials. I have read lots of things posted by others (some bad, some good), but anything negative I could say about Dawn washes would be nothing more than hearsay, so I’ll refrain from doing so. However, if you go to Dawn web site it clearly states that their soap should not be used for washing cars in their FAQ section…that should be enough for most not to use it. That being said, I have used Dawn in the past after others mentioned it being good for prepping the surface (I saw no benefit). While I’ve never actually seen any negative effects from it either, I would much rather use a product like Chemical Guys Citrus Wash. This soap is designed to do the task you mentioned above and at the same time it’s also 100% safe for the automotive finish and trim.
Hope this answers your question,
Rasky
Hey Chad, great article. I’m am 18 years old and I’m starting to get more into detailing cars. I always hand wash my car and my family’s cars, but I’ve started to notice swirl marks and scratches that you can only see in the light when you look closely on all of our cars. All of our cars are Japanese: 1994 Toyota Pickup, 1997 Toyota Camry, 2004 Toyota Sequoia, 2006 Acura RL. And three of the four cars are black with the truck being a dark green. With that said I assume the paints are relatively soft. A simple hand wax or polish done by me or my dad will not do the trick to get the scratches out. Through research, I have learned that to get these out I would need an orbital polisher of some sort. My concern is that I will make the car worse if I get an orbital polisher because I don’t know how to use it. And also my dad thinks that the orbital polisher won’t get the scratches out even though I told him professionals use them to detail cars. (He’s a bit old fashioned) I know you can’t change the opinion of my dad but can you explain to me the best way to get into orbital polishing and it’s techniques so I don’t mess up the paint on my cars? Thank you for your time.
Hi there, I own a new Maruti Swift (6 month old), I am a DIY and I don’t have any rotary or DA machine. Could you please suggest me a what kind of applicators to use for removing light swirls and shallow scratches and to get a good shine. I bought Meg’s M105 and M205 and Meguiars synthetic sealant for protection but wanted to confirm before applying. Thank you in advance
I owned a Cadillac car 5 years ago, now Its shiny are decreasing. So I needed to repair it. First I thought I hire a repair company to shine it. But now I can do it myself. Thanks for your tips.
Hi Chad, you did a nice job. I noticed your paint protection system which is really impressed me. A few months ago had a tour with my Jeep Car, but the road was full of mud. For this reason, I needed to paint my car when arrived. By following your polish ways I got excellent results. Thanks for sharing productive methods