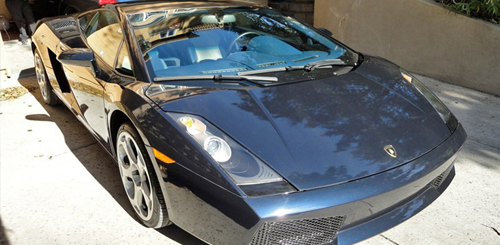
This was a detail I carried out on a 2006 Lamborghini Gallardo in beautiful Blu Fontus Metallic. A dark blue metallic, with blue and grey leather interior. The idea of this detail was to bring the car to better-than-new condition in preparation for sale. In total, I ended up spending about 18 hours bringing the car to a level it hadn’t ever been in the past.
As the first pictures will let you know: it wasn’t driven too much!
I assure you, the writing on the window said “Sucker.” The wife found it quite funny–the husband (my client), no so much!
I carried out the typical two bucket wash.
Utilizing my E-Z Detail Brush I was able to reach to the back of the barrel, and behind the brake calipers.
Knowing the leather was light grey, I decided I’d put on Leatherique Rejuviator Oil on right away, before continuing with the rest of the detail, so I could let it set on the leather for as long as possible.
Here are some pictures of the leather before hand:
It was more of a musty brownish-grey than actual grey! I made sure to give it a healthy dose of Leatherique Rejuviator Oil:
Once the leather was coated, I moved on to the paint. This is where the majority of time is spent during a detail. Here are some before pictures:
Knowing how hard Lamborghini clear coat is, I ended up settling on the combo of Meguiar’s M105 and Surfbuf pads for two passes, on the PC 7424XP, and followed that up with Menzerna PO106FA Super Finish on a Lake Country Tangerine Pad utilizing my Makita Rotary, as I like to finesse the finish more with a rotary polisher, than I do DA polisher.
One of the most precarious things to detail on the car:
The first two slats on the left side have been polished, the other three have not. Notice correction wasn’t perfect, but greatly improved. A steady hand, and careful taping:
Notice how the tape on the sides of the slats goes down farther into the body of the car than just the surface. An often-overlooked area when taping.
The tail lights were treated in the same manner as the paint:
Remember the rear fender pictured above?
Much better:
A great 50/50 of the top of the door, and the top of the rear quarter panel:
The top of the door before:
And once complete:
Even the small areas around the engine cover were attended to.
It was a reach, but it was polished out just the same!
The door is polished out, the front fender has yet to be polished:
Even the clear engine cover was polished with an all-in-one.
Here is the engine bay before:
And after being conditioned with 303 Aerospace Protectant
I didn’t forget about the leather, don’t worry! After the Leatherique Rejuviator Oil had almost two days to soak in to the leather hide, I followed Todd’s Leatherique Write-Up to properly remove the Rejuvinator Oil, and condition the hide.
For whatever reason, I didn’t take any “after” pictures of the interior, but here is a 50/50 showing the difference the Leatheriqe made to the leather. The two cushions on the right have been properly “de-browned,” and the left two are still awaiting their final treatment!
Finally, after 18 hours of work over two days, the car was complete! Here’s the after pictures:
(I’m a HUGE fan of lambs-wool dusters. They are extremely soft, won’t scratch paint, and work fantastic!)
And there you have it! Thanks for bearing with me through the picture heavy article. I hope you all enjoyed reading it as much as I enjoyed working on it! Please leave any questions or comments below!
Buy Products From This Article
Purchase the products used in this article individually or in one convenient package here!
